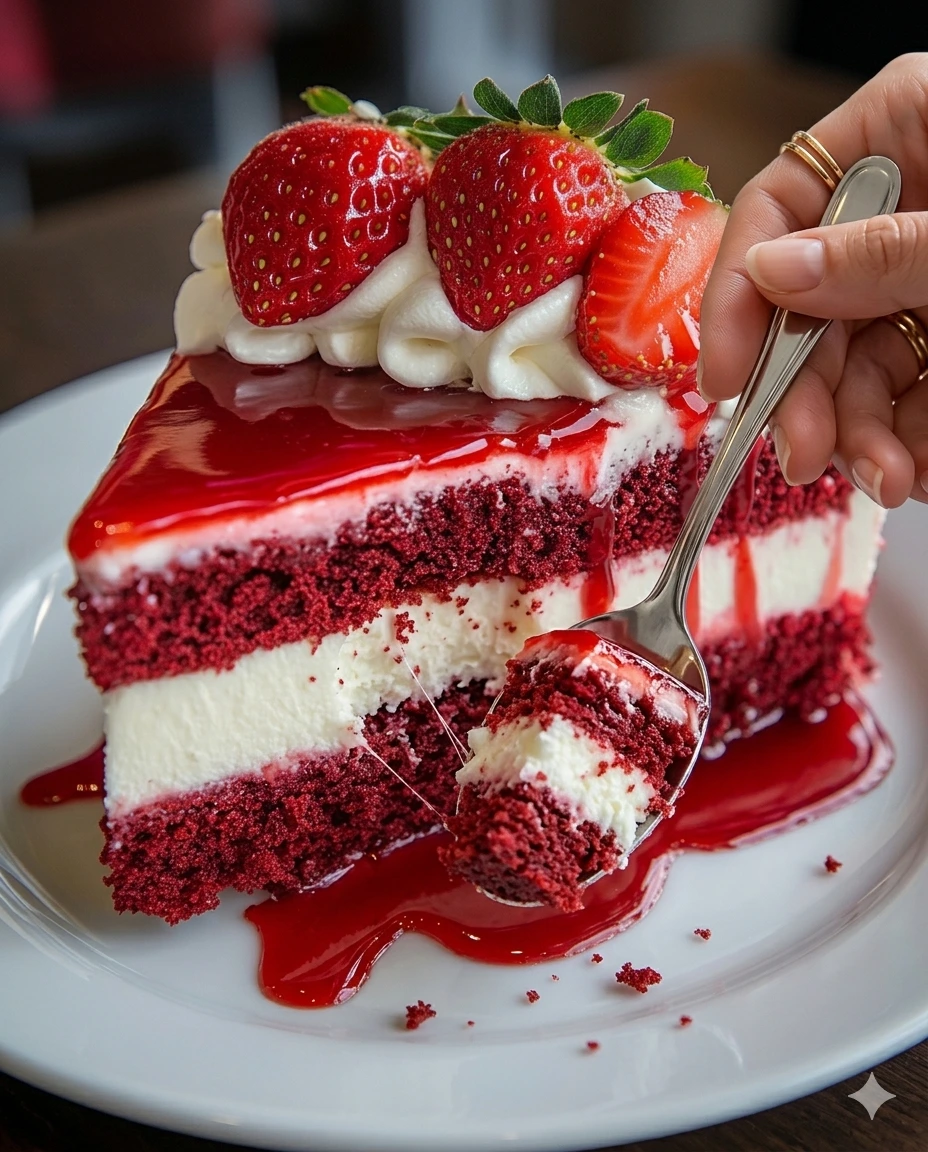
This showstopping Red Velvet Strawberry Cheesecake masterfully layers a rich, moist crimson cocoa sponge with a velvety, fruit-kissed strawberry cheesecake. Crowned with sweet, glossy macerated berries that release their natural juices, this dessert delivers a stunning contrast of vibrant reds and soft pinks, making it the perfect center-piece for celebrations.
Recipe Specifications
-
Yield: 12 servings (One 8-inch cheesecake)
-
Prep Time: 30 minutes
-
Baking Time: 100 minutes
-
Total Time: 130 minutes (Plus chilling overnight)
-
Difficulty: Medium
-
Cuisine: American
-
Dietary Profile: Vegetarian-Friendly
Comprehensive Ingredients Checklist
1. The Red Velvet Cake Base
-
1 ½ cups all-purpose flour
-
1 cup granulated sugar
-
¼ cup unsweetened cocoa powder
-
1 teaspoon baking powder
-
½ teaspoon baking soda
-
½ teaspoon salt
-
1 cup vegetable oil
-
½ cup buttermilk (vital for flavor and crumb tenderness)
-
1 large egg
-
2 tablespoons red food coloring (gives the classic velvet glow)
-
1 teaspoon pure vanilla extract
-
1 teaspoon white vinegar (activates the baking soda for a light lift)
2. The Creamy Strawberry Cheesecake Layer
-
16 ounces (450g) full-fat cream cheese, thoroughly softened to room temperature
-
1 cup granulated sugar
-
½ cup sour cream (adds a beautiful tang and silkiness)
-
½ cup heavy cream
-
2 large eggs
-
1 cup fresh strawberries, pureed until completely smooth
-
1 teaspoon pure vanilla extract
3. The Macerated Strawberry Topping
-
1 cup fresh strawberries, clean and neatly sliced
-
¼ cup granulated sugar
-
1 tablespoon fresh lemon juice (brightens up the berry juices)
Step-by-Step Production & Assembly Guide
+-------------------------------------------------------------+
|    TOPPING: Glossy, Ruby Macerated Sliced Strawberries      |
+-------------------------------------------------------------+
|    MIDDLE: Creamy, Pastel-Pink Strawberry Cheesecake Layer   |
+-------------------------------------------------------------+
|    BASE: Rich, Decadent Crimson Red Velvet Cake Sponge     |
+-------------------------------------------------------------+
|               BAKED IN AN 8-INCH SPRINGFORM PAN             |
+-------------------------------------------------------------+
Phase 1: Baking the Red Velvet Foundation
-
Oven & Pan Setup: Preheat your oven to 175°C (350°F). Lightly grease an 8-inch springform pan and line both the bottom and sides with parchment paper to ensure a clean release later.
-
Combine the Dry: In a large mixing bowl, sift together the 1 ½ cups of all-purpose flour, 1 cup of sugar, ¼ cup of cocoa powder, 1 teaspoon of baking powder, ½ teaspoon of baking soda, and ½ teaspoon of salt. Whisk to distribute evenly.
-
Whisk the Wet: In a separate medium bowl, vigorously whisk together the 1 cup of vegetable oil, ½ cup of buttermilk, 1 large egg, 2 tablespoons of red food coloring, 1 teaspoon of vanilla extract, and 1 teaspoon of white vinegar until uniform.
-
Mix & Bake Base: Pour the wet ingredients into the dry mixture. Fold gently with a spatula until just combined and no streaks of flour remain. Pour the smooth crimson batter into your prepared springform pan, leveling the top. Bake for 25–30 minutes (or until a toothpick inserted in the center comes out clean).
-
Cool Down: Remove from the oven and allow the cake layer to cool completely inside the pan on a wire rack. Do not remove the cake from the pan.
Phase 2: Whipping & Baking the Strawberry Cheesecake
-
Reset the Oven: Lower your oven temperature to 160°C (325°F).
-
Smooth the Cheese: In a large clean bowl (or a stand mixer), beat the 16 ounces of softened cream cheese on medium speed until it is entirely smooth, light, and free of any lumps.
-
Incorporate the Creams: Add the 1 cup of sugar and blend well. Next, mix in the ½ cup of sour cream and ½ cup of heavy cream until velvety.
-
Emulsify the Eggs & Fruit: Turn your mixer to low. Add the 2 large eggs one at a time, beating just until incorporated after each addition. Finally, gently stir in the 1 teaspoon of vanilla and 1 cup of smooth strawberry puree until the batter turns a lovely pastel pink color.
-
The Layered Bake: Pour the strawberry cheesecake batter directly over the completely cooled red velvet cake base in the springform pan. Place the springform pan onto a large flat baking sheet.
-
Bake: Bake for 60–70 minutes. You will know it’s ready when the edges are slightly puffed up and stable, but the very center still has a slight, uniform jiggle when the pan is gently shaken.
-
The Gentle Cool Down: Turn off the oven entirely. Crack the oven door open slightly (about an inch) and let the cheesecake rest inside the warm oven for 1 hour. This slow drop in temperature is essential to prevent cracks.
-
The Deep Chill: Transfer the cheesecake to the refrigerator and let it chill for at least 4 hours, or ideally overnight, to let the structure set fully firm.
Phase 3: Macerating the Berries & Serving
-
Juice the Berries: About 10–15 minutes before you plan to serve, toss your 1 cup of sliced fresh strawberries with ¼ cup of sugar and 1 tablespoon of lemon juice in a small bowl. Let the mixture sit at room temperature for 10 minutes until the sugar dissolves and draws out a glossy, ruby-red strawberry syrup.
-
Unmold & Dress: Carefully run a warm knife around the inner edge of the springform pan, release the collar, and slide the cheesecake onto a serving platter.
-
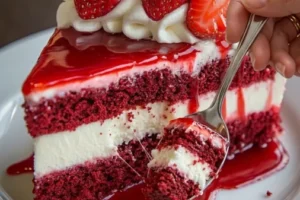
Garnish: Spoon the macerated strawberries along with their sweet, glossy juices over the top of the chilled cheesecake. Slice with a warm, clean knife and enjoy!
Chef’s Professional Success Tips
-
Preventing the Dreaded Cheesecake Crack: Cracking is caused by thermal shock or trapped air. Ensuring your cream cheese, sour cream, and eggs are at absolute room temperature before blending prevents lumps and eliminates the need to over-whip the batter. Over-whipping forces excess air into the cheesecake, causing it to puff up drastically in the oven and collapse into deep cracks as it cools.
-
The Clean Slice Technique: To achieve beautiful, restaurant-quality slices that display the sharp contrast between the deep crimson cake and the pink cheesecake, fill a tall glass with hot water. Dip your sharp chef’s knife into the hot water, wipe it completely dry with a clean cloth, and make your first slice. Repeat this dipping and wiping process for every single cut.
Red Velvet Strawberry Cheesecake
- Total Time: 130 minutes
- Yield: 12 servings 1x
- Diet: Vegetarian
Description
A showstopping cheesecake that layers a rich crimson red velvet cake with a creamy strawberry cheesecake, topped with glossy macerated strawberries.
Ingredients
- 1 ½ cups all-purpose flour
- 1 cup granulated sugar
- ¼ cup unsweetened cocoa powder
- 1 teaspoon baking powder
- ½ teaspoon baking soda
- ½ teaspoon salt
- 1 cup vegetable oil
- ½ cup buttermilk
- 1 large egg
- 2 tablespoons red food coloring
- 1 teaspoon pure vanilla extract
- 1 teaspoon white vinegar
- 16 ounces full-fat cream cheese
- 1 cup granulated sugar
- ½ cup sour cream
- ½ cup heavy cream
- 2 large eggs
- 1 cup fresh strawberries, pureed
- 1 teaspoon pure vanilla extract
- 1 cup fresh strawberries, sliced
- ¼ cup granulated sugar
- 1 tablespoon fresh lemon juice
Instructions
- Preheat the oven to 175°C (350°F) and prepare the springform pan.
- Sift together flour, sugar, cocoa powder, baking powder, baking soda, and salt.
- Whisk vegetable oil, buttermilk, egg, red food coloring, vanilla extract, and vinegar in a separate bowl.
- Combine wet and dry ingredients, pour into the pan, and bake for 25–30 minutes.
- Cool the cake completely in the pan.
- Lower the oven temperature to 160°C (325°F).
- Beat cream cheese until smooth, then add sugar, sour cream, and heavy cream.
- Incorporate eggs one at a time, then mix in vanilla and strawberry puree.
- Pour cheesecake batter onto the cooled cake base and bake for 60–70 minutes.
- Cool the cheesecake in the oven for 1 hour, then chill for at least 4 hours.
- Macerate strawberries with sugar and lemon juice shortly before serving.
- Unmold the cheesecake and top with macerated strawberries before slicing.
Notes
Ensure all dairy and eggs are at room temperature to avoid cracks in the cheesecake.
- Prep Time: 30 minutes
- Cook Time: 100 minutes
- Category: Dessert
- Method: Baking
- Cuisine: American
Nutrition
- Serving Size: 1 slice
- Calories: 450
- Sugar: 35g
- Sodium: 300mg
- Fat: 25g
- Saturated Fat: 12g
- Unsaturated Fat: 10g
- Trans Fat: 0g
- Carbohydrates: 55g
- Fiber: 2g
- Protein: 7g
- Cholesterol: 80mg
Keywords: red velvet cheesecake, strawberry dessert, showstopper cake, celebrations