There are desserts that come and go with trends, and then there are desserts that somehow survive every generation. Icebox cake belongs firmly in the second category. Originally popularized during the 1920s, this deceptively simple no-bake dessert continues to win hearts nearly a century later. While many desserts require precision baking, complicated techniques, and specialized equipment, an icebox cake asks for little more than patience and a refrigerator. The result is a stunning dessert that looks as though it took hours of professional pastry work to create.
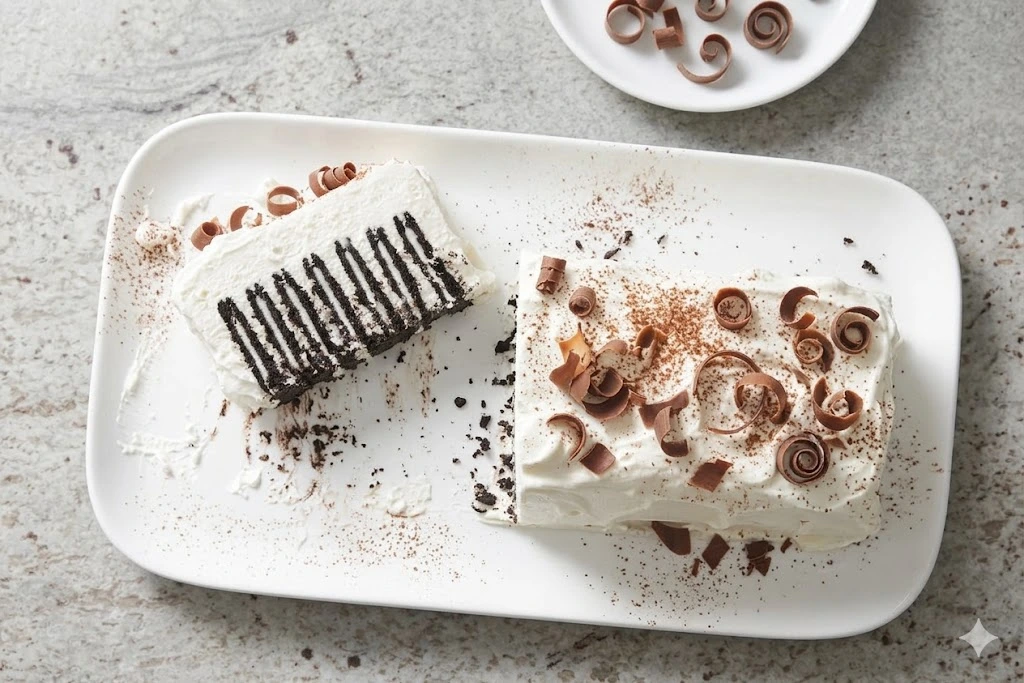
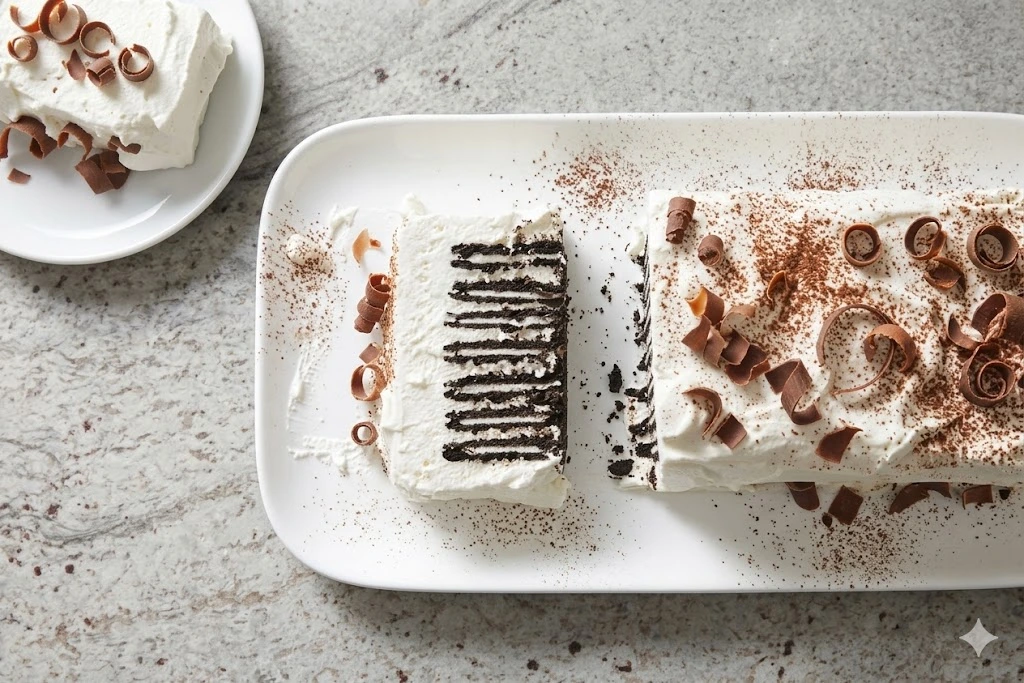
One glance at a slice reveals beautiful striped layers that resemble zebra patterns running through the cake. The visual effect feels almost magical. Friends and family often assume it requires baking skills worthy of a pastry chef, yet the entire dessert comes together with whipped cream and cookies. The refrigerator does all the hard work, transforming crisp wafers into tender cake-like layers overnight.
The beauty of an icebox cake lies in its simplicity. It is refreshing, creamy, rich, and surprisingly elegant. During hot summer months when nobody wants to turn on the oven, it becomes the perfect solution. Whether you’re preparing a family gathering, holiday celebration, or casual weekend treat, this classic dessert delivers impressive results with minimal effort.
The Fascinating History of Icebox Cake
How the Dessert Emerged in the 1920s
The icebox cake rose to popularity during the 1920s, coinciding with the growing availability of refrigerators and iceboxes in American homes. Food historians note that the dessert emerged as manufacturers promoted refrigeration technology and sought creative ways to encourage consumers to use these new household appliances. Recipes frequently appeared on product packaging, making icebox cakes accessible to home cooks across the country.
Unlike traditional cakes that required baking from scratch, icebox cakes embraced convenience. Families could assemble layers of cookies and cream without heating the kitchen. During an era when air conditioning was rare, avoiding a hot oven during summer was a major advantage. The dessert quickly became associated with easy entertaining and modern household efficiency.
Why Icebox Cakes Became an American Favorite
One reason for the dessert’s lasting popularity is its adaptability. Icebox cakes evolved from older European desserts such as trifles and charlottes but were simplified for everyday kitchens. Instead of baking sponge cakes or ladyfingers, home cooks used commercially produced cookies. This shortcut made the dessert faster, easier, and more affordable.
The classic chocolate wafer version became particularly famous thanks to recipes printed on wafer packaging. Over time, families created their own traditions, adding fruits, puddings, nuts, and flavored creams. Even after nearly 100 years, the dessert remains beloved because it balances nostalgia with endless creativity.
What Makes an Icebox Cake So Special?
The Science Behind the Magic Layers
At first glance, icebox cake seems too simple to work. How can cookies and whipped cream transform into something resembling a perfectly baked cake? The answer lies in moisture migration. As the dessert chills, the whipped cream slowly transfers moisture into the cookies. The once-crisp wafers soften and absorb flavor, developing a texture remarkably similar to cake.
This transformation is the heart of the icebox cake experience. Each cookie layer becomes tender while still maintaining enough structure to create distinct stripes. The process is slow but reliable. Given enough refrigeration time, the dessert practically assembles itself.
Why It Looks More Complicated Than It Really Is
Many desserts depend on precise measurements and exact baking times. Icebox cake thrives on simplicity. The striped interior appears intricate because the cookie stacks are placed horizontally before chilling. When sliced diagonally, the layers create a dramatic visual effect.
It’s a bit like a magician revealing a secret trick. The audience sees something extraordinary, but the method behind it is surprisingly straightforward. That combination of ease and elegance explains why icebox cake remains a favorite among both beginner and experienced home cooks.
Ingredients for the Perfect Icebox Cake
The ingredient list is refreshingly short.
| Ingredient | Amount | Purpose |
| Heavy whipping cream | 3 cups | Creates rich homemade whipped cream |
| Confectioners’ sugar | 2 tablespoons | Adds subtle sweetness |
| Vanilla extract | 1 teaspoon | Enhances flavor |
| Chocolate wafers | 40 cookies | Forms the cake layers |
| Chocolate curls | Optional | Decorative garnish |
Heavy Whipping Cream
The whipped cream serves as the backbone of the dessert. Homemade whipped cream delivers a fresher taste and smoother texture than store-bought alternatives. The high fat content creates stability while providing the moisture necessary to soften the cookies.
Using cold cream is essential. Chilled cream whips faster and holds peaks better, resulting in a stable cake structure. Richness is one of the defining characteristics of a great icebox cake, and heavy cream delivers that luxurious mouthfeel.
Confectioners’ Sugar and Vanilla Extract
A small amount of confectioners’ sugar sweetens the cream without making it overly sugary. Since the cookies contribute sweetness as well, restraint is important. The goal is balance rather than overwhelming sweetness.
Vanilla extract adds warmth and complexity. Even a single teaspoon can dramatically improve flavor. For an elevated presentation, vanilla bean paste creates beautiful flecks throughout the cream.
Chocolate Wafers
Traditional recipes call for thin chocolate wafers. Historically, many bakers relied on Nabisco Famous Chocolate Wafers, which became closely associated with classic icebox cake recipes. Though those cookies were discontinued, alternatives such as brownie crisp cookies, chocolate wafer cookies, chocolate graham crackers, and similar crisp cookies work beautifully.
The key requirement is crispness. Soft cookies won’t absorb moisture in the same way and may compromise the final texture.
Chocolate Curls and Optional Garnishes
Chocolate curls add sophistication and visual appeal. They transform a simple homemade dessert into something worthy of a bakery display case. If chocolate curls aren’t available, chocolate shavings, sprinkles, crushed candy bars, or cocoa powder can create equally attractive finishes.
Fresh berries also pair exceptionally well with chocolate layers, adding brightness and color contrast.
Step-by-Step Instructions
Making Homemade Sweetened Whipped Cream
Begin by pouring the heavy whipping cream into a large chilled mixing bowl. Using a hand mixer or stand mixer, beat until soft peaks form. Soft peaks gently fold over when the beaters are lifted.
Add the confectioners’ sugar and vanilla extract. Continue mixing until stiff peaks develop. At this stage, the whipped cream should hold its shape firmly. Be careful not to overmix, as whipped cream can quickly become grainy.
The finished whipped cream should appear smooth, glossy, and airy. This texture ensures the cream spreads easily while maintaining enough structure to support the cookie layers.
Building the Signature Cookie Stacks
Spread a generous teaspoon of whipped cream onto each chocolate wafer. Stack the cookies one by one, creating six separate stacks. Think of each stack as a miniature tower held together by fluffy cream.
Once assembled, carefully turn the stacks onto their sides on a serving platter. Arrange them together to create a long cake shape approximately 14 inches in length. This horizontal arrangement creates the famous striped pattern visible when the cake is sliced.
Although the process may seem unusual initially, it is actually one of the simplest assembly methods in dessert making. The structure gains strength as it chills.
Frosting and Chilling the Cake
Cover the entire cake with the remaining whipped cream. Ensure the top and sides are completely frosted. The cream should seal the cookies and create a smooth exterior.
Add chocolate curls or desired garnishes. Then comes the most important step: refrigeration. Allow the cake to chill for at least four to six hours, though overnight chilling often produces the best texture.
Patience pays off here. During refrigeration, the cookies absorb moisture and transform into soft, cake-like layers. The longer resting time allows flavors to meld beautifully.
Icebox Cake Variations You’ll Love
Different Cookie Options
One of the greatest strengths of icebox cake is versatility. While chocolate wafers remain traditional, numerous alternatives can create exciting flavor profiles.
Popular options include:
- Graham crackers
- Vanilla wafers
- Chocolate chip cookies
- Peanut butter cookies
- Oreo cookies
- Oatmeal cookies
- Chocolate graham crackers
Each choice produces a distinct texture and flavor experience. Graham crackers create a lighter dessert, while peanut butter cookies introduce rich nutty notes.
Creative Fillings and Flavor Additions
Why stop at whipped cream? Creative additions can elevate an already delicious dessert.
Consider layering:
- Fresh strawberries
- Raspberries
- Blueberries
- Lemon curd
- Chocolate pudding
- Peanut butter
- Caramel sauce
- Toasted nuts
- Fruit preserves
Each ingredient adds personality and creates a customized dessert tailored to individual tastes.
Flavored Whipped Cream Ideas
Whipped cream acts like a blank canvas waiting for flavor. Coffee extract creates mocha-inspired layers. Hazelnut flavoring pairs beautifully with chocolate wafers. Mint extract delivers a refreshing chocolate-mint experience.
Citrus zest can brighten the dessert, while cocoa powder creates an extra-rich chocolate variation. The possibilities are nearly endless.
Storage and Freezing Guide
Refrigeration Best Practices
Since icebox cake relies on whipped cream, refrigeration is essential. Store leftovers in an airtight container or tightly covered serving dish. Properly stored, the cake remains fresh for approximately three days.
The texture is often best during the first two days. By day three, the cookies continue softening and may become less distinct. Even so, the flavor remains delicious.
Avoid leaving the dessert at room temperature for extended periods. The whipped cream can lose stability, especially during warm weather.
Freezing and Thawing Tips
Icebox cake freezes surprisingly well. Wrap the cake tightly in aluminum foil and place it in the freezer for up to one month.
When ready to serve, transfer the cake to the refrigerator and allow it to thaw gradually for several hours. Slow thawing preserves texture and prevents excess moisture from accumulating.
Many people even enjoy icebox cake partially frozen. The result resembles an ice cream cake with a creamy, refreshing consistency.
Serving Suggestions and Presentation Ideas
Presentation can transform a simple dessert into a showstopper. The classic approach uses chocolate curls scattered across the whipped cream surface. This elegant finish highlights the dessert’s chocolate-forward flavor profile while adding visual sophistication.
Fresh berries create beautiful color contrast. Strawberries, raspberries, and blackberries pair naturally with chocolate and cream. Chopped nuts add crunch and texture, balancing the softness of the cake.
For special occasions, drizzle chocolate sauce across individual slices. A dusting of cocoa powder or powdered sugar can create a professional bakery-style finish. Because each slice reveals those signature zebra-like stripes, serving icebox cake always feels like unveiling a surprise.
Common Mistakes to Avoid
Even simple desserts can encounter challenges. One common mistake is under-whipping the cream. If the whipped cream lacks structure, the cake may collapse or become messy during slicing.
Another issue is insufficient chilling time. Four hours is generally the minimum, but overnight refrigeration often produces superior results. Rushing this step prevents the cookies from achieving their signature cake-like texture.
Using soft cookies is another frequent error. Crisp cookies absorb moisture gradually and maintain layer definition. Soft cookies may become overly soggy. Finally, avoid overloading the cake with fillings. While additions are wonderful, excessive ingredients can destabilize the structure and make slicing difficult.
Conclusion
The classic icebox cake proves that extraordinary desserts do not require complicated techniques. Nearly a century after its introduction in the 1920s, this no-bake masterpiece continues to delight home cooks and dessert lovers alike. Its enduring appeal comes from a perfect combination of convenience, beauty, and flavor. With nothing more than whipped cream, cookies, and time, an ordinary collection of ingredients transforms into a dessert worthy of celebration.
FAQs
- Why is it called an icebox cake?
The dessert gets its name from the iceboxes used before modern refrigerators became common. The cake sets and develops its texture entirely through chilling rather than baking.
- Can I make icebox cake a day ahead?
Yes. In fact, making it a day ahead is recommended because overnight chilling creates the best texture and flavor.
- What can I use instead of chocolate wafers?
You can substitute graham crackers, vanilla wafers, Oreo cookies, brownie crisp cookies, or other crisp cookies.
- How long does icebox cake last in the refrigerator?
When stored properly in an airtight container, it generally stays fresh for up to three days.
- Can I freeze icebox cake?
Absolutely. Icebox cake freezes well for up to one month and can be thawed in the refrigerator before serving.
Print
Icebox Cake
- Total Time: 360 minutes
- Yield: 8 servings 1x
- Diet: Vegetarian
Description
A classic no-bake dessert made with whipped cream and chocolate wafers, creating stunning layered stripes.
Ingredients
- 3 cups Heavy whipping cream
- 2 tablespoons Confectioners’ sugar
- 1 teaspoon Vanilla extract
- 40 cookies Chocolate wafers
- Optional: Chocolate curls for garnish
Instructions
- Begin by pouring the heavy whipping cream into a large chilled mixing bowl. Beat until soft peaks form.
- Add the confectioners’ sugar and vanilla extract. Continue mixing until stiff peaks develop.
- Spread a teaspoon of whipped cream onto each chocolate wafer. Stack them to create six separate stacks.
- Carefully turn the stacks onto their sides on a serving platter to form a long cake shape.
- Cover the entire cake with the remaining whipped cream, ensuring a smooth exterior.
- Refrigerate for at least 4-6 hours or overnight for best texture.
Notes
For added flavor, consider layering fresh fruits or using flavored whipped cream.
- Prep Time: 15 minutes
- Cook Time: 0 minutes
- Category: Dessert
- Method: No-Bake
- Cuisine: American
Nutrition
- Serving Size: 1 slice
- Calories: 350
- Sugar: 22g
- Sodium: 35mg
- Fat: 28g
- Saturated Fat: 17g
- Unsaturated Fat: 9g
- Trans Fat: 0g
- Carbohydrates: 30g
- Fiber: 1g
- Protein: 3g
- Cholesterol: 100mg
Keywords: icebox cake, no-bake dessert, chocolate dessert, summer dessert, easy dessert