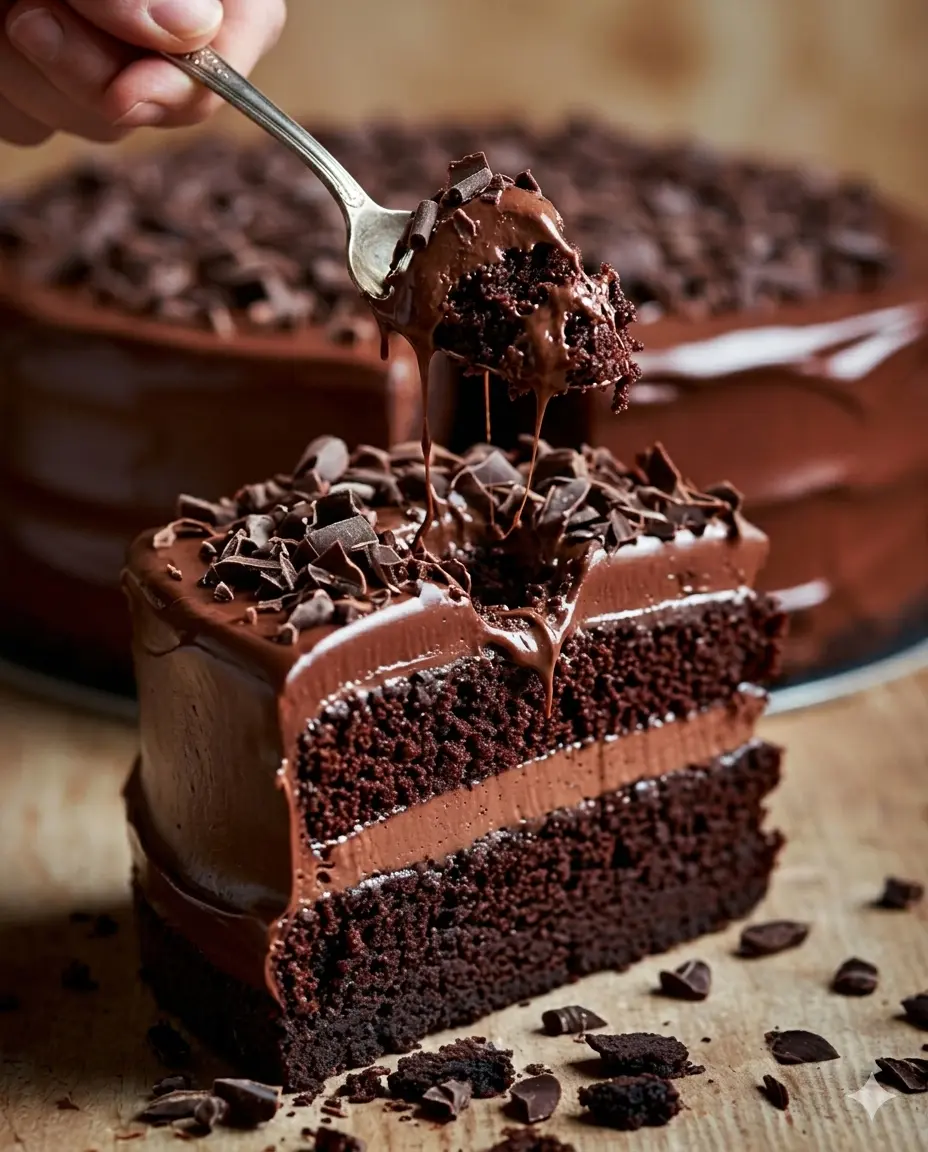
If you are hunting for an ultra-luxurious, bakery-quality masterpiece that delivers an intense, melt-in-your-mouth chocolate experience, this Ultimate Chocolate Truffle Cake is your absolute dream come true. This recipe pairs an incredibly moist, close-crumbed dark chocolate sponge with a velvety, decadently rich dark chocolate ganache that mimics the texture of a high-end French truffle.
By utilizing hot coffee to bloom the cocoa solids and omitting heavy butter in the sponge base, the cake retains a remarkably soft, velvet-like texture that stays perfectly hydrated even after chilling. Crowned with an elegant shower of delicate chocolate curls, this cake delivers a striking presentation that makes it a magnificent centerpiece for birthdays, anniversaries, or any true chocolate lover’s celebration.
Why You Will Love This Recipe
-
Deep Truffle Texture: The silky ganache functions as both a rich internal filling and a glossy external glaze, delivering a pure, unadulterated chocolate experience.
-
The Secret Coffee Bloom: Adding hot coffee expands the flavor profile of the cocoa powder, making the cake taste significantly richer without leaving a trace of coffee flavor behind.
-
Remarkably Moist Crumb: Using vegetable oil instead of solid butter guarantees a sponge that stays light, soft, and moist, even after resting in a cold refrigerator.
-
Simple One-Bowl Base: The chocolate cake layers come together effortlessly in a single bowl without requiring a complex creaming step or a stand mixer.
 Prep Time: 20 mins   |   Bake Time: 30-35 mins   |   Cooling Time: 1 hr minimum
 Course: Dessert      |   Cuisine: American       |   Yield: 1 premium 8-inch layer cake (12 slices)
 Oven Temp: 180°C     |   Pan Type: Two 8-inch round pans |   Profile: Intensely chocolatey, silky, and moist
Ingredients Checklist
For a completely uniform filling that does not lump, ensure your eggs and milk are entirely at room temperature before you begin mixing.
For the Velvet Dark Chocolate Layers
-
1¾ cups All-Purpose Flour: Establishes the foundational structural framework for the cake layers.
-
¾ cup Cocoa Powder: The star dry ingredient; choose a high-quality unsweetened variety for a robust color and taste.
-
2 cups Granulated Sugar: Sweetens and disrupts gluten strands to guarantee an ultra-tender crumb.
-
1½ teaspoons Baking Powder & 1½ teaspoons Baking Soda: The essential dual-leavening system that gives the layers a perfect, even rise.
-
1 teaspoon Salt: Sharpens the natural cocoa notes and balances the overall sweetness.
-
2 Large Eggs: Adds structure, stability, and essential richness to the batter.
-
1 cup Milk: Hydrates the dry ingredients while softening the sponge matrix.
-
½ cup Vegetable Oil: Keeps the crumb exceptionally moist and perfectly soft when cold.
-
2 teaspoons Vanilla Extract: Complements and heightens the aromatic depth of the chocolate.
-
1 cup Hot Coffee (or Hot Water): The vital liquid catalyst used to “bloom” the cocoa powder and thin out the batter.
For the Silky Dark Chocolate Ganache
-
250 g Dark Chocolate: Finely chopped; choose a premium baking bar (around 60% to 70% cocoa content) for a smooth melt.
-
1 cup Heavy Cream: Emulsifies the chocolate into a luxurious, spreadable truffle glaze.
For the Elegant Finishing Touches
-
Chocolate Curls or Shavings: For a beautiful final dusting that adds a hint of visual texture and color.
Step-by-Step Baking & Assembly Instructions
1. Whip and Bloom the Batter
-
Preheat your oven to 180°C (350°F). Generously grease two 8-inch round cake pans and line the bottoms with parchment paper for a clean, non-stick release.
-
In a large mixing bowl, whisk together the 1¾ cups of flour, ¾ cup of cocoa powder, 2 cups of sugar, 1½ teaspoons of baking powder, 1½ teaspoons of baking soda, and 1 disapproval of salt until completely uniform.
-
Add the 2 eggs, 1 cup of milk, ½ cup of vegetable oil, and 2 teaspoons of vanilla extract. Beat with an electric hand mixer or a sturdy whisk until the batter is entirely smooth and cohesive.
-
Gradually stream in the 1 cup of hot coffee (or hot water), stirring steadily. Note: The batter will look remarkably thin and watery at this stage—this is exactly how it should look! The high liquid volume guarantees an exceptionally moist crumb.
-
Divide the glossy batter evenly between your two prepared pans.
2. Bake and Cool the Sponge
-
Slide the pans onto the center rack of your preheated oven and bake for 30 to 35 minutes.
-
The Doneness Test: Insert a wooden toothpick into the center of the cakes. It should emerge completely clean or with a few tiny, dry crumbs. If wet batter adheres to the toothpick, return them to the oven for another 2 minutes.
-
Let the cakes cool completely on a wire rack before assembling. Attempting to frost warm cakes will instantly melt your beautiful ganache filling.
3. Emulsify the Velvet Ganache
-
Place your 250 g of finely chopped dark chocolate into a medium heatproof bowl.
-
In a small saucepan over medium heat, warm the 1 cup of heavy cream until it is hot and steaming (do not let it hit a rolling boil).
-
Pour the hot cream directly over the chopped chocolate. Let it sit undisturbed for 2 minutes to safely melt the cocoa butter fats, then stir patiently with a spoon from the center outward until it transforms into a silky, glossy, and uniform dark ganache.
-
Leave the ganache on your counter to cool down and thicken slightly until it reaches a spreadable, soft-butter consistency.
4. Build and Garnish Your Masterpiece
-
Place your first cooled chocolate cake layer flat on a serving platter or cake stand.
-
Spread a thick, even layer of the cooled dark chocolate ganache over the top of the sponge using an offset spatula.
-
Gently lower the second cake layer directly over the filling, pressing down softly to lock it into place.
-
Use the remaining thickened ganache to cleanly coat the exterior sides and top of the entire cake.
-
Scatter a generous shower of chocolate curls or shavings across the crown for a stunning, professional finish.
-
Slide the completed cake into the refrigerator to chill for 30 minutes to lock the layers in place before slicing into clean, magnificent wedges. Serve cold or at room temperature and enjoy!
Pro Pastry Secrets for Flawless Results
-
The Clean-Slice Strategy: Because chocolate ganache sets firm when chilled, cutting into it directly from the fridge can cause the cake to compress. To get pristine, sharp slices, fill a tall glass with hot water. Dip your sharp chef’s knife into the water, wipe the blade completely dry with a towel, and slice straight down through the cake. Clean and re-warm the knife between every single cut.
-
The Ganache Rescue Rule: If your ganache cools down too much and becomes too stiff or hard to spread, do not panic. Simply microwave the bowl in short 5-second bursts, stirring well between each interval, until it returns to a perfectly silky, cooperative consistency.
Storage and Freshness Preservation
-
Refrigeration Mandate: Because this cake features a high volume of real heavy cream in the ganache, it should be kept in a cold environment. Store the cake inside an airtight container or loosely tented with plastic wrap in the refrigerator for up to 5 days.
-
Serving Strategy: For the absolute best sensory experience, let individual slices sit on the counter for 10 to 15 minutes before serving. This brief window allows the cold cocoa butter fats in the truffle ganache to soften slightly, giving you a luxurious, melt-on-your-tongue texture that beautifully complements the moist sponge.
Structural & Texture Summary
| Metric | Details |
| Baking Style | Traditional Oven Bake (Utilizes chemical leaveners and hot liquids for structural lift) |
| Texture Profile | Velvet-soft, highly hydrated cake layers bound by a dense, silky truffle glaze |
| Flavor Profile | Dominant notes of intense dark cocoa, bittersweet chocolate, and sweet vanilla |
Try Also: Irresistible Dessert Ideas from
-
What is Dubai Chocolate Bar Made Of? Key Ingredients Explained
-
Rose Milk Cake Recipe
-
Strawberry Cheesecake Dump Cake Recipe
Ultimate Chocolate Truffle Cake
- Total Time: 1 hour 55 minutes
- Yield: 12 servings 1x
- Diet: Vegetarian
Description
A luxuriously moist chocolate cake with a rich dark chocolate ganache, perfect for any chocolate lover’s celebration.
Ingredients
- 1¾ cups All-Purpose Flour
- ¾ cup Cocoa Powder
- 2 cups Granulated Sugar
- 1½ teaspoons Baking Powder
- 1½ teaspoons Baking Soda
- 1 teaspoon Salt
- 2 Large Eggs
- 1 cup Milk
- ½ cup Vegetable Oil
- 2 teaspoons Vanilla Extract
- 1 cup Hot Coffee (or Hot Water)
- 250 g Dark Chocolate, finely chopped
- 1 cup Heavy Cream
- Chocolate Curls or Shavings for garnish
Instructions
- Preheat your oven to 180°C (350°F). Grease two 8-inch round cake pans and line with parchment paper.
- Whisk together flour, cocoa powder, sugar, baking powder, baking soda, and salt in a large mixing bowl.
- Add eggs, milk, vegetable oil, and vanilla extract, then beat until smooth.
- Stream in hot coffee, stirring steadily until combined.
- Divide the batter evenly between the prepared pans.
- Bake for 30 to 35 minutes until a toothpick comes out clean.
- Cool the cakes on a wire rack.
- Place chopped dark chocolate in a medium heatproof bowl.
- Heat heavy cream until hot, then pour over chocolate and let sit for 2 minutes.
- Stir the mixture until it becomes a silky ganache.
- Spread ganache over the first cake layer, then top with the second layer.
- Coat the entire cake with the remaining ganache.
- Garnish with chocolate curls and chill for 30 minutes before serving.
Notes
For pristine slices, dip your knife in hot water before cutting. Store the cake in an airtight container in the refrigerator for up to 5 days.
- Prep Time: 20 minutes
- Cook Time: 35 minutes
- Category: Dessert
- Method: Baking
- Cuisine: American
Nutrition
- Serving Size: 1 serving
- Calories: 450
- Sugar: 30g
- Sodium: 300mg
- Fat: 25g
- Saturated Fat: 15g
- Unsaturated Fat: 8g
- Trans Fat: 0g
- Carbohydrates: 55g
- Fiber: 4g
- Protein: 6g
- Cholesterol: 60mg
Keywords: Chocolate Cake, Truffle Cake, Dessert