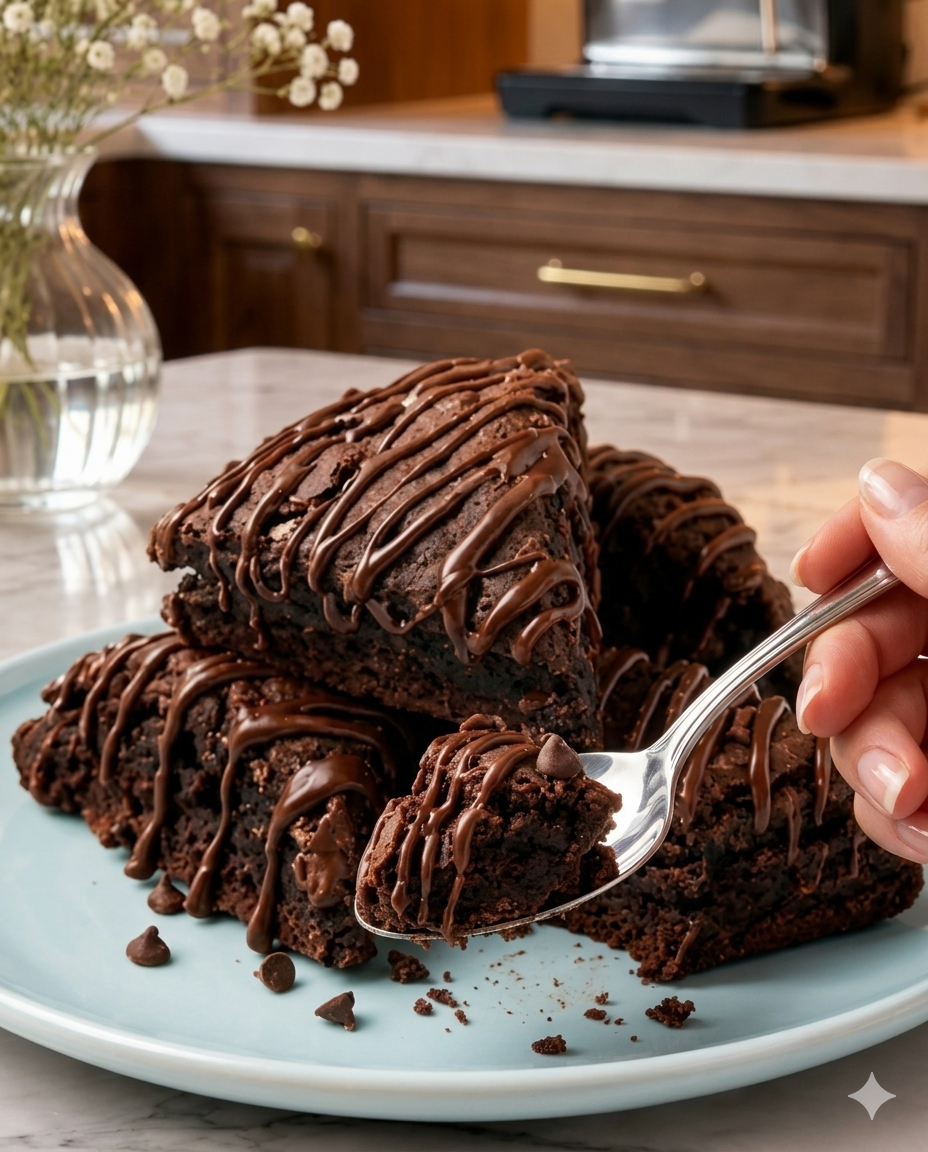
For those who believe chocolate is a perfectly acceptable way to start the morning, these Triple Chocolate Scones are an absolute revelation. Yielding a texture that perfectly bridges the gap between a flaky, high-end bakery pastry and a soft, fudgy chocolate brownie, this recipe is a chocolate lover’s dream.
By utilizing precision cold-fat incorporation and strategic chill rests, this guide ensures your scones rise beautifully in the oven, maintaining crisp, defined edges and a tender, melt-in-your-mouth crumb.
Recipe Specifications
-
Yield: 12 substantial scones
-
Prep Time: 20 minutes
-
Baking Time: 18 minutes
-
Chilling Intervals: ~45 minutes total (critical for texture)
-
Total Time: 1 hour 23 minutes
-
Flavor Profile: Deep, bittersweet cocoa base complemented by pockets of sweet milk chocolate chips and an elegant, glossy dark chocolate drizzle.
Comprehensive Ingredients Checklist
1. The Dry Cocoa Base
-
2 cups all-purpose flour, sifted
-
½ cup premium dark cocoa powder (such as Hershey’s Dark)
-
⅓ cup packed light brown sugar (adds essential moisture and a subtle caramel undertone)
-
1 ½ teaspoons baking powder
-
½ teaspoon baking soda
-
¼ teaspoon fine table salt
-
1 teaspoon ground cinnamon (the secret baker’s spice that amplifies the natural chocolate aromatics)
2. The Solid & Liquid Emulsions
-
½ cup (1 stick) unsalted butter, ice-cold and cubed
-
¾ cup real buttermilk, cold (the acidity activates the baking soda for a perfect rise)
-
1 large egg, cold
-
1 teaspoon pure vanilla extract
3. The Chocolate Inclusions & Glaze
-
1 cup miniature chocolate chips (mini chips ensure chocolate in every single bite without weighing down the dough)
-
½ cup high-quality dark chocolate melting wafers or premium dark chocolate chips
Step-by-Step Production & Assembly Guide
+-------------------------------------------------------------+
|    GLAZE: Elegant, Zig-Zagged Dark Chocolate Drizzle        |
+-------------------------------------------------------------+
|    BODY: Flaky, Tender Cocoa Dough Packed with Mini Chips   |
+-------------------------------------------------------------+
|    BASE: Crisp, Golden-Brown Caramelized Bottom Crust       |
+-------------------------------------------------------------+
|              SHAPED INTO TWO 6-INCH GEOMETRIC DISCS         |
+-------------------------------------------------------------+
Phase 1: Fabricating the Flaky Dough Foundation
-
Unify the Dry Base: In a large mixing bowl, thoroughly whisk together the 2 cups of flour, ½ cup of dark cocoa powder, ⅓ cup of packed brown sugar, 1 ½ teaspoons of baking powder, ½ teaspoon of baking soda, ¼ teaspoon of salt, and 1 teaspoon of cinnamon.
-
Cut the Fat: Add your ½ cup of ice-cold cubed butter to the flour mixture. Using a pastry blender or two forks, quickly cut the butter into the flour until the mixture resembles coarse, pea-sized sandy crumbs.
-
Incorporate Chips & Chill: Stir in the 1 cup of mini chocolate chips. Transfer the bowl to the refrigerator to chill for 10 minutes. This ensures the butter remains perfectly solid before the liquids are introduced.
Phase 2: Hydration and Cold Manipulation
-
The Liquid Blend: In a separate small bowl, whisk together the cold buttermilk, 1 large egg, and 1 teaspoon of vanilla extract.
-
The Gentle Fold: Create a well in the center of your chilled flour mixture. Pour in the buttermilk blend and stir gently with a fork just until a soft, sticky dough begins to form. Crucial Rule: Do not overwork or knead the dough. Over-handling develops gluten, changing the texture from a light, flaky pastry to a tough, bready puck.
-
The Second Chill: Pop the sticky dough back into the refrigerator to rest for 15 to 20 minutes. This relaxes the gluten and cools the butter fats down once again.
Phase 3: Geometric Layering and Scoring
-
Divide and Shape: Divide the chilled dough into 2 equal portions. Place both dough rounds directly onto a large baking sheet lined with parchment paper.
-
The Disc Technique: Dust your hands lightly with flour. Gently press and shape each portion into a flat, uniform 6-inch circle.
-
Score the Wedges: Using a sharp, floured knife, score each circle into 6 equal triangle wedges (cutting about halfway down through the dough, but not separating them). Note: The dough will be quite sticky; do not attempt to move or separate the wedges at this stage.
-
The Critical Final Chill: Place the entire baking sheet into the refrigerator for a final 15 to 30 minutes. This sets the butter solid, ensuring the scones hold their height and don’t melt flat into puddles when they hit the hot oven.
Phase 4: Baking, Slicing, and Enrobing Logistics
-
The Hot Bake: While the dough takes its final rest, preheat your oven to 205°C (400°F). Slide the chilled pan into the center rack and bake for exactly 18 minutes until the surfaces look matte and set.
-
Slice Apart: Remove from the oven and let the scone discs cool on the pan for 5 minutes. While still warm, use a sharp chef’s knife to slice completely through the pre-scored lines to separate the 12 individual scones. Move them to a wire rack to cool down completely.
-
The Melting Process: Place your ½ cup of dark chocolate melting wafers into a small microwave-safe bowl. Microwave in brief 30-second intervals, stirring thoroughly between each burst, until the chocolate is completely fluid, smooth, and glossy.
-
The Artful Drizzle: Transfer the melted chocolate into a small ziplock bag and snip a tiny fraction off one corner. Drizzle the chocolate in elegant zig-zag patterns across the tops of the fully cooled scones. Let the glaze sit undisturbed for 10–15 minutes until it snaps firm. Serve alongside a steaming cup of dark roast coffee.
Chef’s Professional Success Tips
-
The Secret to Ultimate Flakiness: Scones rely entirely on steam to rise and create distinct layers. When the cold pockets of butter trapped in the dough hit the intense 400°F heat of the oven, the water inside the butter instantly evaporates, creating tiny steam pockets that puff up the flour. If your butter gets warm or melts during mixing, it will blend completely into the flour, resulting in a flat, heavy, dense scone. Keep everything freezing cold!
-
Handling Sticky Dough with Ease: Because this dough contains brown sugar and cocoa, it can feel incredibly tacky to the touch. Avoid the temptation to dump cups of extra flour onto your work surface to dry it out, as this will make your pastry dry and chalky. Instead, rely on the refrigeration rests to make the dough manageable, and lightly flour only your hands when shaping.
-
Storage Preservation: Store your completely cooled and glazed scones in a tightly sealed airtight container at room temperature for up to 3 days. To revive that direct-from-the-bakery texture on day two, simply pop a scone into a 350°F oven or toaster oven for 3–4 minutes right before enjoying.
Try Also: Irresistible Dessert Ideas from
Triple Chocolate Scones
- Total Time: 83 minutes
- Yield: 12 servings 1x
- Diet: Vegetarian
Description
These Triple Chocolate Scones combine a flaky pastry texture with fudgy brownie-like goodness, perfect for chocolate lovers.
Ingredients
- 2 cups all-purpose flour, sifted
- ½ cup premium dark cocoa powder
- ⅓ cup packed light brown sugar
- 1 ½ teaspoons baking powder
- ½ teaspoon baking soda
- ¼ teaspoon fine table salt
- 1 teaspoon ground cinnamon
- ½ cup (1 stick) unsalted butter, ice-cold and cubed
- ¾ cup real buttermilk, cold
- 1 large egg, cold
- 1 teaspoon pure vanilla extract
- 1 cup miniature chocolate chips
- ½ cup high-quality dark chocolate melting wafers or premium dark chocolate chips
Instructions
- Unify the dry ingredients in a large mixing bowl by whisking together flour, cocoa powder, brown sugar, baking powder, baking soda, salt, and cinnamon.
- Cut in the ice-cold cubed butter until the mixture resembles coarse crumbs.
- Stir in the mini chocolate chips and chill the bowl in the refrigerator for 10 minutes.
- Whisk together buttermilk, egg, and vanilla extract in a separate bowl.
- Create a well in the chilled flour mixture, then pour in the buttermilk blend, stirring gently until a soft dough forms.
- Chill the dough again for 15-20 minutes.
- Divide the dough into two portions and shape them into 6-inch circles on a lined baking sheet.
- Score each circle into 6 wedges with a knife.
- Chill the baking sheet again for 15-30 minutes.
- Preheat your oven to 400°F (205°C).
- Bake the scones for 18 minutes until matte and set.
- Cool the scones on the pan for 5 minutes before slicing them into wedges.
- Microwave the dark chocolate melting wafers until fluid and drizzle over the cooled scones.
- Let the glaze sit undisturbed until set.
Notes
For best results, ensure all ingredients are cold to achieve the perfect scone texture. Store in an airtight container for up to 3 days.
- Prep Time: 20 minutes
- Cook Time: 18 minutes
- Category: Dessert
- Method: Baking
- Cuisine: American
Nutrition
- Serving Size: 1 scone
- Calories: 320
- Sugar: 12g
- Sodium: 250mg
- Fat: 14g
- Saturated Fat: 8g
- Unsaturated Fat: 4g
- Trans Fat: 0g
- Carbohydrates: 42g
- Fiber: 3g
- Protein: 6g
- Cholesterol: 20mg
Keywords: chocolate scones, baked goods, dessert, chocolate recipe, brunch