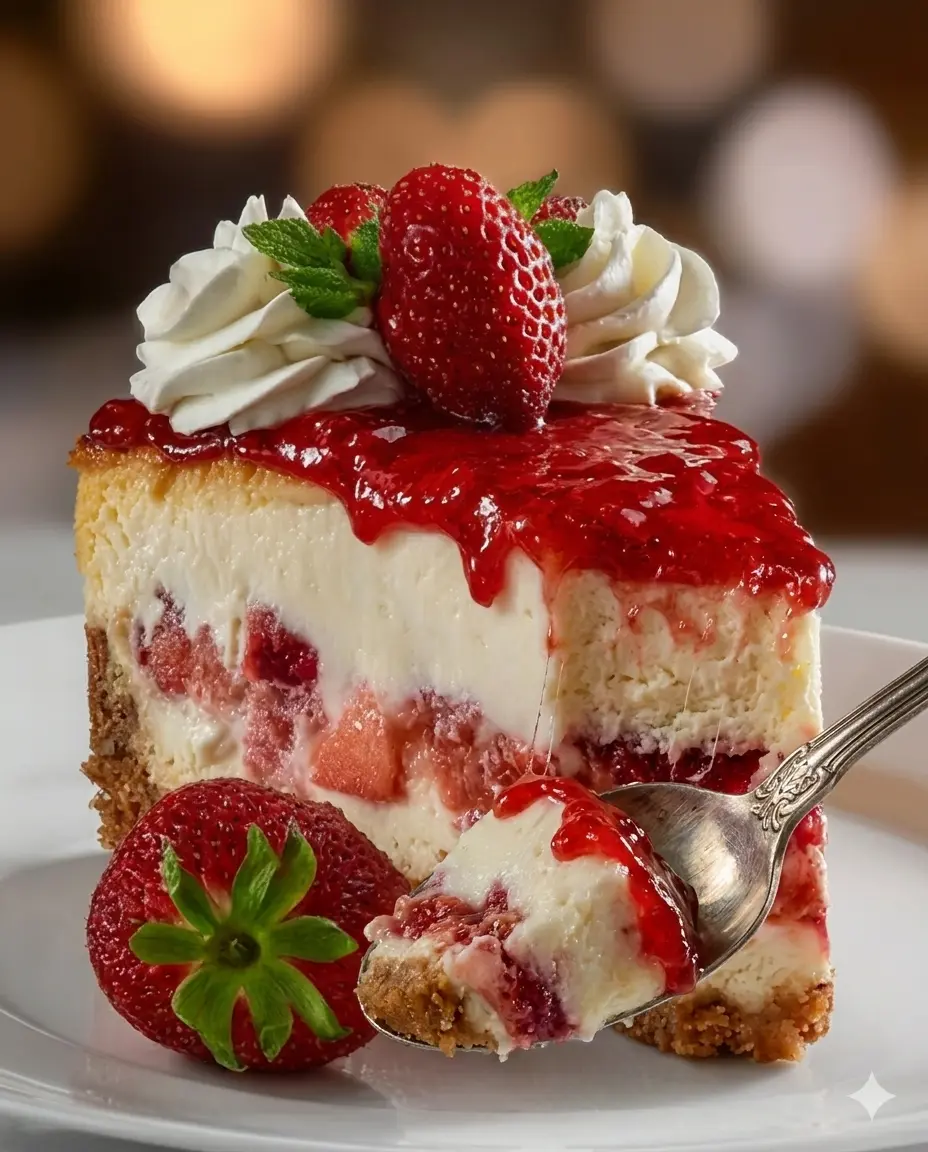
This magnificent Strawberries & Cream Dream Layer Cake is the ultimate celebration of contrasting textures and vibrant flavors. It features soft, velvety layers of rich crimson red velvet cake paired with a light, mousse-like no-bake cheesecake filling. Infused with both sweet, jammy strawberry compote and juicy, fresh macerated berries, this majestic double-layer cake cuts beautifully to reveal clean, striking, restaurant-quality layers.
Recipe Specifications
-
Yield: 14 generous slices
-
Prep Time: 45 minutes
-
Baking Time: 30 minutes
-
Total Time: 75 minutes (plus overnight chilling)
-
Pan Size: Two 9-inch round cake pans
-
Skill Level: Medium
-
Cuisine: American
-
Dietary Profile: Vegetarian-Friendly
Comprehensive Ingredients Checklist
1. The Velvet Cake Layers
-
1 box premium red velvet cake mix
-
Eggs, oil, and water (in the exact quantities specified on your specific cake mix box)
-
1 teaspoon pure vanilla extract (optional; boosts the bakery-style aroma)
2. The No-Bake Mousse Cheesecake Filling
-
24 ounces (680g) full-fat cream cheese, thoroughly softened to room temperature
-
1 cup granulated white sugar
-
1 tablespoon fresh lemon juice
-
1 teaspoon pure vanilla extract
-
2 cups heavy whipping cream, thoroughly chilled
3. The Double-Strawberry Fusion Layers
-
Macerated Layer: 2 cups fresh strawberries (hulled and sliced) + 2 tablespoons granulated sugar
-
Glossy Compote Layer: 2 cups strawberries (diced) + ⅓ cup granulated sugar + 1 tablespoon fresh lemon juice + 1 tablespoon cornstarch mixed with 2 tablespoons water (your thickening slurry)
4. Elegant Garnishes & Topping
-
Extra fresh sliced strawberries
-
Sweetened whipped cream or rich cream cheese frosting (optional, for decorative piping)
Step-by-Step Production & Assembly Guide
+-------------------------------------------------------------+
|    GARNISH: Whipped Cream Stars & Fresh Strawberry Fan      |
+-------------------------------------------------------------+
|    TOP: Smooth, Thick Layer of No-Bake Cheesecake Filling   |
+-------------------------------------------------------------+
|    LAYER 4: Soft, Decadent Red Velvet Cake Sponge           |
+-------------------------------------------------------------+
|    LAYER 3: Velvet Cheesecake Mousse Filling Layer          |
+-------------------------------------------------------------+
|    INTERIOR: Glossy Jammy Compote & Juicy Macerated Berries |
+-------------------------------------------------------------+
|    LAYER 2: Velvet Cheesecake Mousse Filling Layer          |
+-------------------------------------------------------------+
|    BASE: Soft, Decadent Red Velvet Cake Sponge              |
+-------------------------------------------------------------+
|             BUILT INSIDE A 9-INCH SPRINGFORM COLLAR         |
+-------------------------------------------------------------+
Phase 1: Fabricating and Prepping the Cake Sponges
-
Oven & Pan Setup: Preheat your oven according to the directions printed on your cake mix package. Grease two 9-inch round cake pans and line the bottoms with circles of parchment paper.
-
Mix & Bake: Prepare the cake batter following the box instructions, stirring in the 1 teaspoon of optional vanilla extract to elevate the flavor. Divide the crimson batter equally between the two prepared pans and bake as directed.
-
Cool and Level: Let the baked cakes cool inside their pans for 10 minutes, then invert them onto a wire rack to cool down completely to room temperature. Once entirely cold, use a long serrated bread knife to carefully trim away any domed tops so the cake layers are completely flat and level.
Phase 2: Processing the Strawberry Elements
-
The Macerated Fruit: In a medium bowl, toss your 2 cups of sliced strawberries with 2 tablespoons of sugar. Set aside at room temperature for 10 to 15 minutes. The sugar will draw out the fruit’s natural moisture, creating a glossy, sweet syrup.
-
The Thickened Compote: In a small saucepan over medium heat, combine the 2 cups of diced strawberries, ⅓ cup of sugar, and 1 tablespoon of lemon juice. Cook for about 5 minutes until the berries break down and release their juices.
-
Thicken: Stir your cornstarch-and-water slurry into the bubbling fruit. Simmer continuously for 2 to 3 minutes more, stirring constantly, until the compote thickens into a glossy, clear gel. Remove from heat and let it cool completely to room temperature.
Phase 3: Whipping the Cheesecake Mousse Filling
-
Smooth the Cheese Base: In a large bowl (or stand mixer), beat the 24 ounces of softened cream cheese on medium-high speed until entirely smooth and free of lumps. Add the 1 cup of sugar, lemon juice, and vanilla extract. Beat until light and beautifully creamy.
-
Whip the Cream: In a separate, chilled bowl, whip your 2 cups of cold heavy cream until it holds firm, stiff peaks.
-
Fold Tenderly: Using a rubber spatula, add a third of the whipped cream to the cream cheese base to loosen it. Then, very gently fold in the remaining whipped cream in two batches using a slow figure-eight motion. This preserves the trapped air, giving you an ultra-light, mousse-like texture. Keep chilled until assembly.
Phase 4: Architectural Assembly & Stacking
-
The Foundation: Place your first leveled red velvet cake layer right-side up onto your serving platter. Chef’s Trick: Slide the clean ring of a 9-inch springform pan around the base layer to act as an assembly collar to keep the cake perfectly straight as you stack.
-
The Lower Cream: Spread a thick, even layer of the cheesecake mousse filling (about ⅓ to ½ inch thick) over the base cake using an offset spatula.
-
Fruit Distribution: Scatter the sugary macerated strawberry slices evenly across the cream layer, then spoon and gently smooth the cooled, glossy strawberry compote over the top.
-
The Upper Cream & Cap: Spread another thick layer of the cheesecake mousse directly over the fruit layers. Carefully align and lower your second red velvet cake layer onto the cream, pressing down with minimal pressure just to lock it in place.
-
The Crown: Smooth the remaining cheesecake mousse over the top cake layer. Wrap the cake lightly and transfer it to the refrigerator to chill for at least 4 hours, or ideally overnight, to let the structure lock firm.
-
Decorate & Serve: Once thoroughly set, carefully unclamping the springform ring. Pipe stars of whipped cream around the upper border and arrange fresh sliced strawberries in the center. Slice with a warm knife and enjoy!
Chef’s Professional Success Tips
-
The Stacking Insurance Policy: No-bake cheesecake filling is exceptionally creamy and mousse-like. To ensure your layers stay perfectly centered and don’t slide or bulge outward during assembly, building the cake inside a clean 9-inch springform pan ring or an adjustable cake collar is highly recommended. Once chilled overnight, the cream sets firmly, allowing you to pop the ring open to reveal perfectly vertical, sharp sides.
-
The Slicing Logic: Because this cake features soft cake layers interleaved with delicate mousse and slick strawberry sauces, wiping your knife clean between cuts is essential for clean plating. Dip a sharp chef’s knife into a tall pitcher of hot water, wipe it completely dry on a clean towel, make one clean downward slice from edge to center, and pull the knife out horizontally. Repeat the clean-and-warm process for every cut.
Try Also: Irresistible Dessert Ideas from
Strawberries & Cream Dream Layer Cake
- Total Time: 75 minutes
- Yield: 14 servings 1x
- Diet: Vegetarian
Description
A magnificent double-layer cake featuring red velvet layers, no-bake cheesecake filling, and fresh strawberries.
Ingredients
- 1 box premium red velvet cake mix
- Eggs, oil, and water (as per cake mix instructions)
- 1 teaspoon pure vanilla extract (optional)
- 24 ounces (680g) full-fat cream cheese, softened
- 1 cup granulated white sugar
- 1 tablespoon fresh lemon juice
- 1 teaspoon pure vanilla extract
- 2 cups heavy whipping cream, chilled
- 2 cups fresh strawberries (hulled and sliced) + 2 tablespoons granulated sugar (for maceration)
- 2 cups strawberries (diced) + ⅓ cup granulated sugar + 1 tablespoon fresh lemon juice + 1 tablespoon cornstarch mixed with 2 tablespoons water (for compote)
- Extra fresh sliced strawberries (for garnish)
- Sweetened whipped cream or cream cheese frosting (optional)
Instructions
- Preheat your oven according to the cake mix instructions. Grease two 9-inch round cake pans and line the bottoms with parchment paper.
- Prepare the cake batter according to the box, adding the optional vanilla extract. Divide between pans and bake as directed.
- Cool the cakes in the pans for 10 minutes, then invert onto a wire rack to cool completely. Trim domed tops for level layers.
- Toss the sliced strawberries with sugar and let them sit for 10-15 minutes to macerate.
- Combine diced strawberries, sugar, and lemon juice in a saucepan over medium heat. Cook for about 5 minutes until berries break down.
- Stir in the cornstarch slurry and simmer until thickened, then let it cool.
- Beat the cream cheese until smooth, then add sugar, lemon juice, and vanilla extract. Mix until creamy.
- Whip the heavy cream in a separate bowl until firm peaks form.
- Fold the whipped cream into the cream cheese mixture gently to maintain airiness.
- Assemble the cake starting with one velvet layer, spread a layer of cheesecake filling, add macerated strawberries, followed by strawberry compote, and top with more cheesecake filling.
- Cap with the second layer and top with remaining cheesecake filling. Chill for at least 4 hours or overnight.
- Decorate with whipped cream stars and sliced strawberries before serving.
Notes
For best results, chill overnight and use a sharp knife dipped in hot water for clean slices.
- Prep Time: 45 minutes
- Cook Time: 30 minutes
- Category: Dessert
- Method: Baking
- Cuisine: American
Nutrition
- Serving Size: 1 slice
- Calories: 400
- Sugar: 30g
- Sodium: 300mg
- Fat: 22g
- Saturated Fat: 12g
- Unsaturated Fat: 8g
- Trans Fat: 0g
- Carbohydrates: 42g
- Fiber: 1g
- Protein: 6g
- Cholesterol: 80mg
Keywords: cake, strawberries, red velvet, cheesecake, dessert, celebration