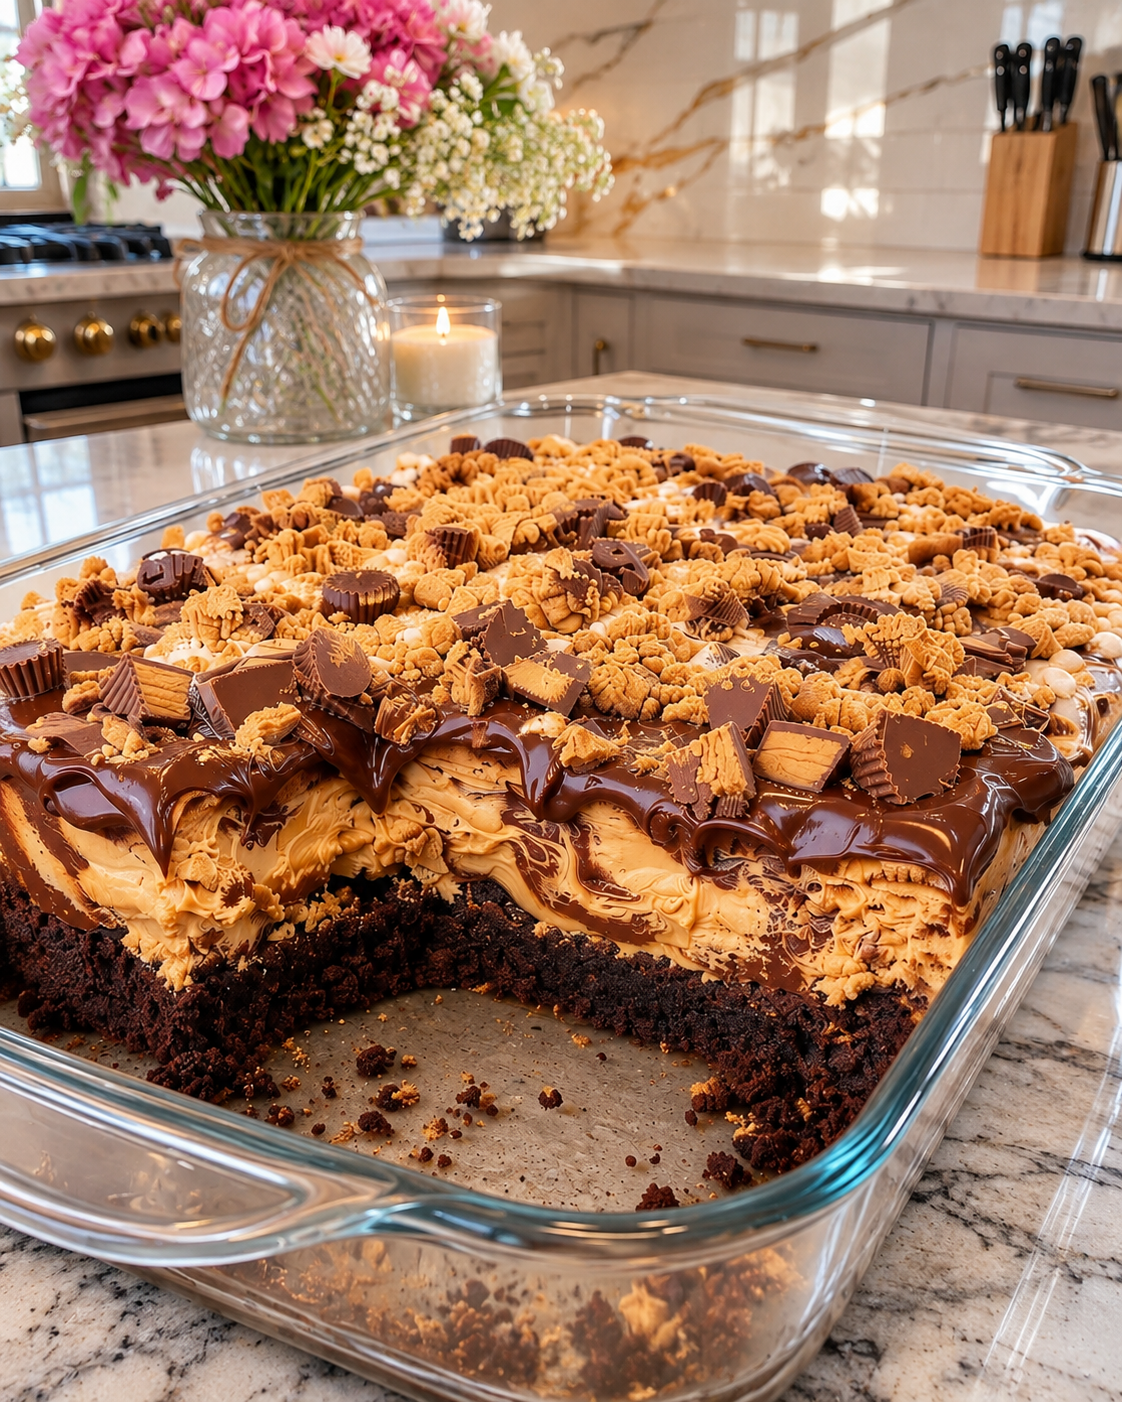
If you’re a chocolate and peanut butter lover, get ready for your new favorite dessert! This Reese’s Peanut Butter Cheesecake with Brownie Crust is the kind of dessert that makes everyone stop and ask for another slice. It’s rich, creamy, chocolatey, and loaded with peanut butter goodness in every bite.
Imagine a thick, fudgy brownie crust packed with melted chocolate and peanut butter chips, topped with a silky-smooth peanut butter cheesecake filling loaded with chopped Reese’s Peanut Butter Cups. And just when you think it couldn’t get any better, the whole cheesecake gets covered with a rich chocolate ganache and even more peanut butter cups.
Seriously, what’s not to love?
This decadent brownie crust peanut butter cheesecake is perfect for birthdays, holiday celebrations, dinner parties, or any special occasion when you want to serve something unforgettable. It takes a little patience because of the chilling time, but every single step is worth it!
Why You’ll Love This Reese’s Peanut Butter Cheesecake
- Three irresistible layers: A fudgy brownie crust, creamy peanut butter cheesecake, and rich chocolate ganache come together in one amazing dessert.
- Packed with Reese’s candy: Chopped miniature peanut butter cups add delicious chocolate and peanut butter flavor throughout the cheesecake.
- Rich and creamy texture: The cream cheese, peanut butter, and heavy cream create a smooth, decadent filling.
- Perfect for special occasions: This cheesecake makes a gorgeous centerpiece for birthdays, holidays, and family gatherings.
- Make-ahead friendly: You can prepare it the day before and let it chill overnight, making dessert prep much easier.
- A chocolate lover’s dream: Every slice is loaded with chocolate chips, brownie goodness, peanut butter, and ganache.
Ingredients You’ll Need
Here’s everything you’ll need to make this Reese’s Peanut Butter Cheesecake with Brownie Crust.
For the Brownie Layer Crust
- 1 box brownie mix (use your favorite store-bought brand)
- 1/2 cup vegetable oil (adjust to box instructions if needed)
- 1/4 cup water (adjust to box instructions if needed)
- 1 large egg
- 1/2 cup semi-sweet chocolate chips
- 1/2 cup peanut butter chips
For the Peanut Butter Cheesecake Filling
- 24 oz cream cheese (3 packages), room temperature
- 1 cup granulated sugar
- 1 tablespoon pure vanilla extract
- 4 large eggs, room temperature
- 3/4 cup creamy peanut butter
- 1/2 cup heavy cream
- 1 tablespoon cornstarch (optional)
- 16 miniature peanut butter cups, chopped
For the Chocolate Ganache and Topping
- 1 cup semi-sweet chocolate chips
- 1/2 cup heavy cream
- 34 miniature Reese’s Peanut Butter Cups, chopped
How to Make Reese’s Peanut Butter Cheesecake with Brownie Crust
Making this cheesecake takes a few steps, but the process is pretty straightforward. Follow along to create those beautiful brownie, cheesecake, and chocolate layers.
Step 1: Prepare the Oven and Water Bath
Preheat your oven to 350°F.
Place a roasting pan or another large baking pan on the lower section of the oven. Add enough hot water so it will reach about 1–2 inches around the cheesecake springform pan once it’s placed inside.
This water bath helps create a gentle baking environment for the cheesecake.
Step 2: Prepare the Springform Pan
Line the bottom of a 9-inch springform pan with a circle of parchment paper cut to fit.
Line the sides with parchment paper as well. Spray the pan with non-stick cooking spray and set it aside.
Step 3: Make the Brownie Crust
In a medium mixing bowl, combine the brownie mix, vegetable oil, water, and egg.
Stir just until everything is combined. Be sure to follow the brownie mix instructions if the required oil or water amounts differ.
Pour the brownie batter into the prepared springform pan and spread it evenly.
Bake for 35 minutes.
Step 4: Add the Chocolate and Peanut Butter Chips
Remove the brownie crust from the oven.
While it’s still hot, immediately sprinkle the semi-sweet chocolate chips and peanut butter chips evenly over the top.
Allow the brownie crust to cool on the counter while you prepare the cheesecake filling.
Step 5: Prepare the Pan for the Water Bath
Reduce the oven temperature to 325°F.
Wrap the outside of the springform pan with three layers of 18-inch heavy-duty aluminum foil.
Make sure the foil covers the bottom and sides of the pan securely. This helps prevent water from leaking into the cheesecake during baking.
Step 6: Make the Peanut Butter Cheesecake Filling
In a large mixing bowl, beat the softened cream cheese on medium speed until smooth and creamy.
Add the granulated sugar and vanilla extract. Continue mixing on medium-high speed for another 1–2 minutes, scraping down the sides of the bowl when needed.
Reduce the mixer speed to low and add the eggs one at a time. Scrape the bowl and mix well after each addition.
Be careful not to overmix, as too much air in the batter can affect the cheesecake texture.
Step 7: Add the Peanut Butter and Heavy Cream
With the mixer on low speed, add the creamy peanut butter and heavy cream.
If you prefer a firmer cheesecake filling, add the optional tablespoon of cornstarch at this stage.
Mix until everything is thoroughly blended and the filling looks smooth and creamy.
Gently fold in the 16 chopped miniature peanut butter cups.
Step 8: Assemble the Cheesecake
Spoon the peanut butter cheesecake filling over the cooled brownie crust.
Spread it evenly across the pan, making sure the filling reaches the edges.
Carefully smooth the top with a spatula.
Step 9: Bake in the Water Bath
Carefully place the foil-wrapped springform pan into the prepared hot water bath in the oven.
Bake at 325°F for 1 hour.
The cheesecake is ready when the top is light golden brown and the center barely jiggles when gently moved.
Step 10: Cool the Cheesecake Slowly
Once the cheesecake has baked for 1 hour, turn off the oven.
Crack the oven door open about an inch by placing a wooden spoon in the door.
Let the cheesecake cool inside the oven for 30 minutes.
This gradual cooling process helps prevent sudden temperature changes.
Step 11: Chill Until Firm
Remove the cheesecake from the water bath and transfer it to a wire cooling rack.
Carefully remove the aluminum foil and let the cheesecake cool for 1 hour.
Place it in the refrigerator and chill for at least 6 hours or overnight.
Don’t rush this step! Proper chilling helps the cheesecake set completely and makes it easier to slice.
Step 12: Prepare the Chocolate Ganache
Once the cheesecake has chilled, gently run a knife around the sides of the pan.
Release the springform sides carefully and remove the cheesecake.
To make the ganache, combine the semi-sweet chocolate chips and heavy cream in a small microwave-safe bowl.
Heat in 30-second intervals, stirring after each interval, until the chocolate is completely melted and the mixture becomes smooth.
Step 13: Add the Ganache and Reese’s Topping
Slowly pour the chocolate ganache over the chilled cheesecake.
Gently spread it across the top, allowing it to create a smooth chocolate layer.
Evenly sprinkle the 34 chopped miniature Reese’s Peanut Butter Cups over the ganache.
Your Reese’s Peanut Butter Cheesecake with Brownie Crust is now ready to enjoy!
Tips for the Best Reese’s Peanut Butter Cheesecake
Use room-temperature cream cheese. Softened cream cheese blends much more easily and helps create a smooth, lump-free cheesecake filling.
Don’t overmix the eggs. Add them one at a time on low speed. Overmixing can incorporate too much air into the batter.
Wrap the springform pan carefully. Use all three layers of heavy-duty aluminum foil to help keep water out during the water bath.
Don’t skip the water bath. It helps the cheesecake bake more gently and evenly.
Cool the cheesecake gradually. Letting it rest in the turned-off oven with the door slightly open helps reduce sudden temperature changes.
Give it enough chilling time. Refrigerate for at least 6 hours or overnight so the filling becomes firm and creamy.
Use good-quality chocolate. Since chocolate is a big part of the topping, using chocolate chips you enjoy eating makes a difference.
How to Store Reese’s Peanut Butter Cheesecake
Because this cheesecake contains cream cheese and heavy cream, it should be stored in the refrigerator.
Keep leftover slices in an airtight container or cover the cheesecake tightly with plastic wrap.
Refrigerate for up to 4–5 days for the best quality.
For the best texture, serve the cheesecake chilled straight from the refrigerator.
Can You Make Reese’s Peanut Butter Cheesecake Ahead of Time?
Absolutely! This is actually a great make-ahead dessert.
You can bake the brownie crust and cheesecake filling a day before serving. Allow the cheesecake to cool, then refrigerate it overnight.
Once it’s fully chilled, prepare the chocolate ganache and add the chopped Reese’s Peanut Butter Cups on top.
This makes it a fantastic dessert for Thanksgiving, Christmas, birthdays, and other special occasions when you want to get some of the baking done ahead of time.
What to Serve With Peanut Butter Brownie Cheesecake
This cheesecake is already rich and indulgent, so simple accompaniments work best.
- Fresh strawberries: Their fruity flavor adds a refreshing contrast to the rich chocolate and peanut butter.
- Vanilla ice cream: A small scoop makes each slice feel like an extra-special dessert.
- Hot coffee: The slightly bitter flavor of coffee balances the sweetness beautifully.
- Cold milk: You can’t go wrong with a classic glass of milk alongside a chocolate peanut butter dessert.
- Fresh raspberries: Their slight tartness pairs wonderfully with the creamy cheesecake.
Frequently Asked Questions
Can I use homemade brownie batter instead of a boxed mix?
This recipe is written using one box of store-bought brownie mix. You can use your favorite brownie mix, following its package instructions for the oil and water amounts.
Why does this cheesecake need a water bath?
A water bath creates a gentler baking environment and helps the cheesecake cook more evenly. It also helps reduce the risk of cracks on the surface.
How do I know when the cheesecake is done?
The top should be light golden brown, and the center should barely jiggle when you gently move the pan. It will continue to set as it cools and chills.
Is the cornstarch necessary?
No. The tablespoon of cornstarch is optional. It can be added if you prefer a firmer cheesecake filling.
Can I use regular peanut butter instead of creamy peanut butter?
Creamy peanut butter is recommended for the smoothest filling and best texture. Using crunchy peanut butter will change the consistency.
How long does Reese’s Peanut Butter Cheesecake need to chill?
The cheesecake needs at least 6 hours in the refrigerator, but chilling it overnight is even better.
Can I freeze this cheesecake?
Yes, cheesecake generally freezes well. For the best results, freeze individual slices in airtight freezer-safe packaging. Thaw them in the refrigerator before serving. The texture of the candy topping may change slightly after freezing.
How many servings does this recipe make?
This recipe makes approximately 12 servings.
Recipe Details
- Recipe Name: Reese’s Peanut Butter Cheesecake with Brownie Crust
- Prep Time: 30 minutes
- Cooking Time: Approximately 1 hour and 35 minutes, including the brownie crust and cheesecake baking
- Cooling Time: 1 hour and 30 minutes
- Chilling Time: At least 6 hours
- Total Time: Approximately 9 hours or more
- Servings: 12 slices
- Calories: 650 kcal per serving
- Course: Dessert
- Cuisine: American
- Difficulty: Intermediate
Final Thoughts
This Reese’s Peanut Butter Cheesecake with Brownie Crust is the ultimate dessert for anyone who can’t get enough of chocolate and peanut butter.
With its rich brownie base, creamy peanut butter cheesecake filling, silky chocolate ganache, and plenty of chopped Reese’s Peanut Butter Cups, every slice is packed with incredible flavor.
It’s a little more involved than your everyday dessert, but it’s absolutely worth the effort. Make it for your next celebration, holiday gathering, or whenever you want to treat your family to something seriously delicious.
One slice is never enough!