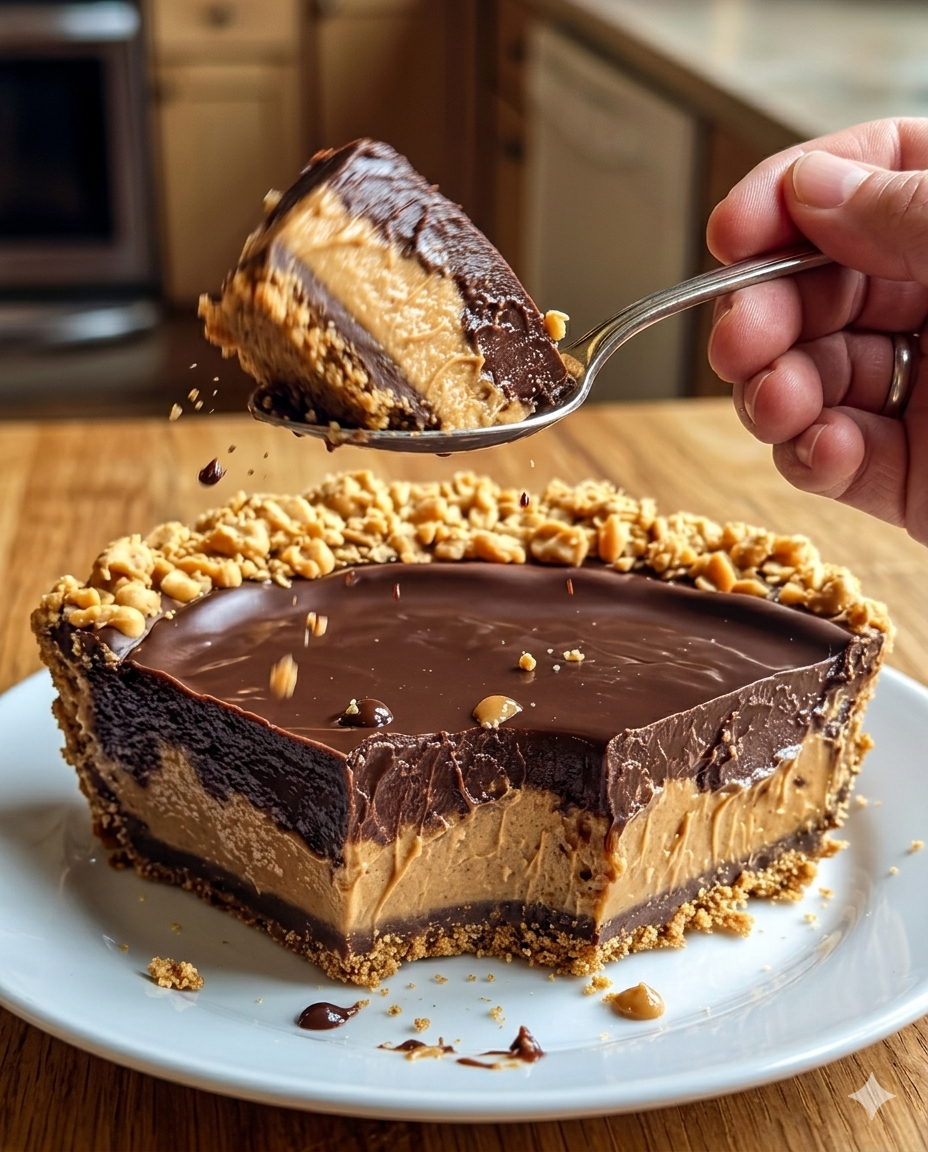
If you are a devotee of the classic, undeniable pairing of chocolate and peanut butter, this No-Bake Chocolate Peanut Butter Pie is the ultimate indulgence. It features a velvety, cloud-like peanut butter mousse filling nestled inside a buttery graham cracker crust, all sealed beneath a rich, glossy layer of chocolate ganache.
Because it is completely no-bake, it is an incredibly low-stress, high-reward dessert. The hardest part of the entire process is simply waiting for it to chill in the refrigerator until it is firm enough to slice! It is a spectacular centerpiece for parties, summer gatherings, or any moment that calls for a decadent sweet treat.
Why You Will Love This Recipe
-
Effortless No-Bake Construction: Keep your oven off entirely. This pie relies on the natural structure of whipped cream and cream cheese to set beautifully in the fridge.
-
Perfect Balance of Rich and Airy: Folding freshly whipped heavy cream into a dense peanut butter and cream cheese matrix yields a luxurious, melt-in-your-mouth texture that never feels overly heavy.
-
Glossy Ganache Crown: A smooth, velvety chocolate coating gives this rustic pie an elegant, bakery-standard finish.
-
Make-Ahead Friendly: This pie keeps exceptionally well in the cold, making it a perfect dessert to assemble the night before your big event.
 Prep Time: 30 mins   |   Cook Time: 0 mins   |   Chill Time: 4 hrs minimum
 Course: Dessert      |   Cuisine: American    |   Yield: 8 decadent slices
 Calories: 400 kcal per serving
Ingredients Checklist
For the smoothest texture, ensure your cream cheese has softened completely to room temperature before mixing. This guarantees a uniform, lump-free filling.
For the Silky Peanut Butter Filling
-
1 cup Creamy Peanut Butter: Adds a rich, nutty foundation. Avoid natural style peanut butters that separate.
-
1 cup Powdered Sugar: Dissolves seamlessly to sweeten the filling without any grit.
-
8 oz Cream Cheese: Softened; use full-fat cream cheese to achieve the absolute best texture and structural stability.
-
1 cup Heavy Whipping Cream: Whipped separately until stiff peaks form to provide structural volume.
For the Chocolate Topping & Assembly
-
1 cup Semi-Sweet Chocolate Chips: The rich, dark chocolate counterweight to the sweet peanut butter.
-
½ cup Milk: Used to gently melt and smooth out the chocolate into a pourable ganache.
-
1 9-inch Graham Cracker Crust: Pre-made store-bought or your own homemade pressed crust.
-
¼ cup Chopped Peanuts (Optional): Provides a wonderful, salty crunch for the final garnish.
Step-by-Step Instructions
Follow these clear, chronological directions to whip your filling, melt your chocolate glaze, and achieve beautiful slices.
1. Whip the Peanut Butter Mousse Filling
-
In a large mixing bowl, combine the 1 cup of creamy peanut butter and 1 cup of powdered sugar. Beat with an electric hand mixer until the mixture is completely smooth.
-
Add the 8 oz of softened cream cheese to the bowl and continue beating steadily until it is fully incorporated and the mixture is entirely free of lumps.
-
In a separate, chilled mixing bowl, pour your 1 cup of heavy whipping cream. Whip on high speed until stiff peaks form (the cream should hold its shape firmly when you lift the beaters).
-
The Gentle Fold: Using a flexible rubber spatula, add the whipped cream into your peanut butter mixture. Gently fold it in by cutting down through the center, sweeping across the bottom, and folding over. Work patiently to keep the texture light, airy, and fluffy.
-
Spoon the airy filling into your 9-inch graham cracker crust and use an offset spatula to spread it into a smooth, completely even layer.
2. Craft the Glossy Chocolate Topping
-
In a medium-sized microwave-safe bowl (or using a double boiler over the stove), combine the 1 cup of semi-sweet chocolate chips and ½ cup of milk.
-
Heat gently, stirring frequently, until the chocolate chips are entirely melted and the mixture transforms into a smooth, glossy liquid.
-
Remove from the heat and stir in a splash of vanilla extract if desired. Let the ganache cool down slightly at room temperature so it thickens a bit before pouring.
-
Carefully pour the cooled ganache over the top of your peanut butter filling layer, tilting the pie dish gently to let it spread evenly across the surface.
3. Chill, Garnish, and Serve
-
Place the pie flat into the refrigerator and chill for a minimum of 4 hours, though leaving it in the fridge overnight is highly recommended for the absolute best set and deepest flavor development.
-
Just before serving, scatter the ¼ cup of chopped peanuts evenly across the top chocolate layer. Feel free to elevate the presentation even further with extra dollops of whipped cream, chocolate curls, or an elegant drizzle of warm caramel.
-
The Flawless Slice Hack: To cut pristine, clean slices with perfectly distinct layers, dip a sharp knife in hot water and wipe the blade completely dry between every single cut. Serve chilled and enjoy!
Pro Presentation & Success Secrets
The Nutty Flavor Booster: If you decide to garnish your pie with the optional chopped peanuts, take an extra 3 minutes to lightly toast them in a dry skillet over medium heat until they become fragrant and golden. Toasting coaxes out the natural oils in the nuts, providing a much deeper peanut aroma and an enhanced, professional crunch that pairs beautifully with the smooth ganache.
Storage and Freshness Guidelines
-
In the Refrigerator: Because this pie is rich in fresh dairy elements (heavy cream and cream cheese), it must always be kept cold. Store any leftovers loosely covered with plastic wrap or a pie dome in the fridge for up to 4 to 5 days.
-
Freezer Alternative: This recipe actually freezes beautifully! If you prefer a texture that closely mimics an ice cream pie, cover the fully set pie tightly in aluminum foil and freeze for up to 1 month. Slice it directly from the freezer or let it thaw in the fridge for 30 minutes before serving.
Nutritional Summary
| Metric | Details |
| Yield | 8 generous, rich slices |
| Caloric Count | 400 kcal per serving |
| Texture Profile | Crisp, buttery graham crust supporting an air-whipped peanut mousse, capped with a velvety, smooth chocolate glaze. |
Frequently Asked Questions (FAQs)
Can I use low-fat cream cheese for the filling?
While you can technically use low-fat or Neufchâtel cheese, full-fat cream cheese is highly recommended. The higher fat content is vital because it provides the necessary structure to help a no-bake pie hold its shape cleanly when sliced. Low-fat varieties contain more water, which can cause the filling to turn out slightly soft or runny.
Why did my chocolate ganache crack when I sliced the pie?
If ganache is made with too high a ratio of chocolate to liquid, it can set rock-hard in the fridge and crack when a knife presses through it. This recipe avoids that by using a full ½ cup of milk to keep the chocolate pliable. To guarantee it never cracks, always use the hot-knife slicing technique mentioned in the instructions!
Try Also: Irresistible Dessert Ideas from
No-Bake Chocolate Peanut Butter Pie
- Total Time: 240 minutes
- Yield: 8 servings 1x
- Diet: Vegetarian
Description
A rich and creamy no-bake dessert featuring a peanut butter mousse filling over a graham cracker crust, topped with a glossy chocolate ganache.
Ingredients
- 1 cup Creamy Peanut Butter
- 1 cup Powdered Sugar
- 8 oz Cream Cheese, softened
- 1 cup Heavy Whipping Cream
- 1 cup Semi-Sweet Chocolate Chips
- ½ cup Milk
- 1 9-inch Graham Cracker Crust
- ¼ cup Chopped Peanuts (Optional)
Instructions
- Whip the Peanut Butter Mousse Filling
In a large mixing bowl, combine the creamy peanut butter and powdered sugar and beat until smooth.
Add the softened cream cheese and continue beating until fully incorporated and smooth.
In a separate chilled bowl, whip the heavy whipping cream on high speed until stiff peaks form.
Fold the whipped cream into the peanut butter mixture gently to maintain lightness.
Spoon the filling into the graham cracker crust and spread evenly. - Craft the Glossy Chocolate Topping
In a microwave-safe bowl, combine the semi-sweet chocolate chips and milk. Heat gently and stir until smooth.
Remove from heat and stir in vanilla extract if desired. Let cool slightly before pouring over the peanut butter filling. - Chill, Garnish, and Serve
Refrigerate the pie for at least 4 hours, or overnight for best results.
Garnish before serving with chopped peanuts, whipped cream, or chocolate curls.
Notes
For the smoothest texture, make sure the cream cheese is completely softened. Pie can be stored in the refrigerator for 4-5 days or frozen for up to 1 month.
- Prep Time: 30 minutes
- Cook Time: 0 minutes
- Category: Dessert
- Method: No-Bake
- Cuisine: American
Nutrition
- Serving Size: 1 slice
- Calories: 400
- Sugar: 20g
- Sodium: 300mg
- Fat: 27g
- Saturated Fat: 10g
- Unsaturated Fat: 15g
- Trans Fat: 0g
- Carbohydrates: 36g
- Fiber: 2g
- Protein: 8g
- Cholesterol: 30mg
Keywords: no-bake dessert, chocolate pie, peanut butter pie, easy dessert, summer treat