There’s something truly special about an old-fashioned chocolate pie. It’s the kind of dessert that instantly brings back memories of family gatherings, holiday dinners, and cozy afternoons spent in grandma’s kitchen. Rich, silky, and packed with deep chocolate flavor, this classic pie proves that simple ingredients can create something extraordinary.
If you’ve been searching for a dessert that feels comforting, nostalgic, and incredibly satisfying, this Old-Fashioned Chocolate Pie is exactly what you need. With a flaky baked crust and a luscious homemade chocolate custard filling, every bite delivers the perfect balance of sweetness and richness.
The best part? You don’t need complicated techniques or fancy ingredients. This recipe uses pantry staples and straightforward steps, making it perfect for both beginner bakers and experienced dessert lovers alike.
Whether you’re preparing dessert for a family dinner, holiday celebration, potluck, or simply satisfying a chocolate craving, this pie is guaranteed to become a favorite.
Why You’ll Love This Old-Fashioned Chocolate Pie
There are countless chocolate desserts to choose from, but this pie stands out for several reasons.
Rich Chocolate Flavor
The combination of unsweetened cocoa powder, creamy milk, and butter creates a filling that tastes deeply chocolatey without being overwhelming.
Smooth and Silky Texture
The custard filling is luxuriously creamy, creating a melt-in-your-mouth experience with every bite.
Easy to Make
No complicated baking techniques are required. If you can whisk ingredients in a saucepan, you can make this pie.
Perfect Make-Ahead Dessert
Chocolate pie actually tastes even better after chilling overnight, making it ideal for entertaining.
Classic Comfort Food
This recipe delivers the nostalgic flavor that generations have loved for decades.
Ingredients You’ll Need
For the Pie Crust
- 1 baked 9-inch pie crust
- Homemade or store-bought
- Completely cooled before filling
For the Chocolate Filling
- 1 cup granulated sugar
- 1/3 cup unsweetened cocoa powder
- 1/4 cup cornstarch
- Pinch of salt
- 2¼ cups whole milk
- 3 large egg yolks, whisked
- 3 tablespoons unsalted butter
- 2 teaspoons vanilla extract
For Serving
- Fresh whipped cream
- Cocoa powder for dusting (optional)
- Chocolate shavings (optional)
Why These Ingredients Work
Every ingredient plays an important role in creating the perfect chocolate pie.
Cocoa Powder
Provides rich chocolate flavor without making the filling too heavy.
Cornstarch
Acts as the primary thickener, creating a smooth, stable custard.
Egg Yolks
Add richness, color, and that classic homemade custard texture.
Butter
Creates a glossy finish and luxurious mouthfeel.
Vanilla Extract
Enhances and rounds out the chocolate flavor beautifully.
Step-by-Step Instructions
Step 1: Prepare the Pie Crust
Begin by baking your pie shell according to package or recipe directions.
Allow the crust to cool completely before adding the filling.
A warm crust can cause condensation and prevent the filling from setting properly.
Step 2: Combine Dry Ingredients
In a medium saucepan, whisk together:
- Sugar
- Cocoa powder
- Cornstarch
- Salt
Whisking the dry ingredients first helps prevent lumps later in the cooking process.
Step 3: Add the Milk
Gradually pour in the milk while whisking continuously.
Continue whisking until the mixture becomes completely smooth.
At this stage, there should be no visible lumps.
Step 4: Cook the Chocolate Mixture
Place the saucepan over medium heat.
Cook while whisking frequently.
As the mixture heats, it will begin to thicken.
Watch carefully for gentle bubbles forming at the surface.
You do not need a vigorous boil. Slow, steady heat creates the smoothest filling.
Step 5: Temper the Egg Yolks
Place the whisked egg yolks in a small bowl.
Slowly add a small amount of the hot chocolate mixture while whisking constantly.
Repeat once or twice.
This process gently raises the temperature of the yolks without scrambling them.
Step 6: Finish the Custard
Pour the tempered yolk mixture back into the saucepan.
Continue cooking while whisking constantly.
Cook for another 2 to 3 minutes until the filling becomes thick, glossy, and pudding-like.
Step 7: Add Butter and Vanilla
Remove the saucepan from the heat.
Stir in:
- Butter
- Vanilla extract
Mix until the butter is completely melted and fully incorporated.
The filling should appear silky and smooth.
Step 8: Fill the Pie Crust
Pour the warm chocolate filling into the cooled pie shell.
Smooth the surface using a spatula.
Press plastic wrap directly onto the filling to prevent a skin from forming.
Step 9: Chill Thoroughly
Refrigerate for at least 4 hours.
For the best texture and flavor, chill overnight.
The filling will continue to firm up as it cools.
Step 10: Garnish and Serve
Before serving, top with freshly whipped cream.
For extra elegance, add:
- Chocolate curls
- Cocoa powder
- Chocolate shavings
Slice and enjoy.
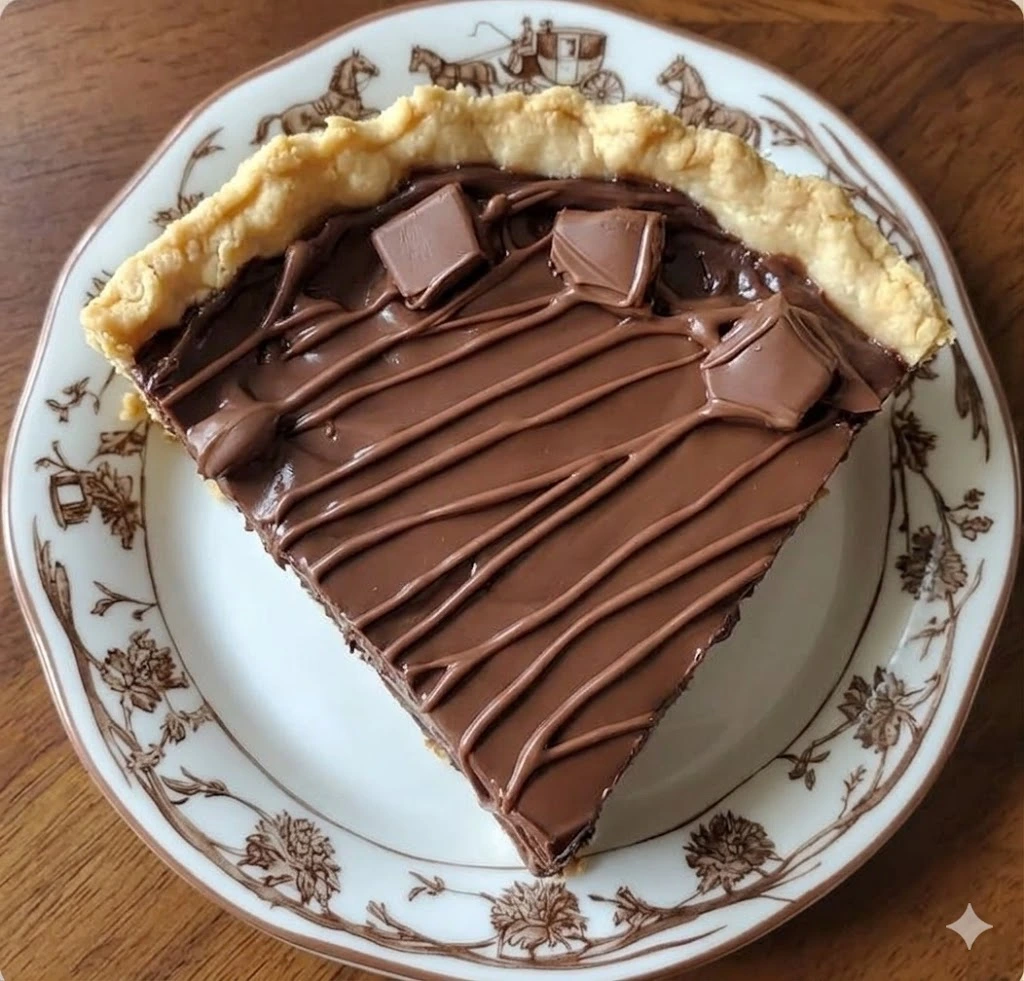
The Secret to a Perfect Chocolate Pie
The beauty of this pie lies in its texture.
You want a filling that is:
- Smooth
- Thick
- Creamy
- Silky
- Easy to slice
Achieving this texture comes down to patience.
Avoid rushing the cooking process.
Moderate heat and constant whisking produce the best results.
Make-Ahead Tips
One reason this pie is so popular is because it can be prepared in advance.
One Day Ahead
Bake the crust and prepare the filling.
Refrigerate overnight.
Two Days Ahead
The pie stays fresh and delicious for up to 48 hours before serving.
Add Toppings Last
Wait until serving time to add whipped cream.
This keeps the topping fresh and fluffy.
Delicious Variations
While the classic version is wonderful, you can easily customize it.
Mocha Chocolate Pie
Add 1 to 2 teaspoons instant espresso powder to the dry ingredients.
Coffee intensifies the chocolate flavor beautifully.
Dark Chocolate Pie
Replace part of the cocoa powder with chopped dark chocolate.
The result is richer and more intense.
Salted Caramel Chocolate Pie
Drizzle caramel sauce over the chilled pie.
Finish with flaky sea salt.
Chocolate Pecan Pie
Sprinkle toasted chopped pecans over the whipped cream topping.
The crunch adds wonderful texture.
Chocolate Cookie Crust
Swap the traditional crust for a chocolate cookie crust.
This creates an even more decadent dessert.
Common Mistakes to Avoid
Overheating the Custard
High heat can cause the filling to become grainy.
Stick with medium heat and whisk frequently.
Skipping the Tempering Step
Adding egg yolks directly to the hot mixture may result in scrambled eggs.
Always temper carefully.
Under-Chilling
The pie needs adequate chilling time to fully set.
Patience is rewarded.
Warm Pie Crust
A warm crust can affect the texture of the filling.
Always cool completely before filling.
Storage Instructions
Refrigerator
Store covered for up to 3 days.
Best Flavor
Many people find the pie tastes even better on the second day.
Freezing
Not recommended.
Custard-based desserts can become watery after thawing.
Perfect Occasions for Chocolate Pie
This dessert works beautifully for:
- Thanksgiving
- Christmas
- Easter
- Family reunions
- Potlucks
- Birthday celebrations
- Sunday dinners
- Casual gatherings
Its classic flavor appeals to guests of all ages.
Frequently Asked Questions
Can I Use Low-Fat Milk?
Whole milk provides the richest texture, but reduced-fat milk can be used.
The filling may be slightly less creamy.
Can I Make It Without Eggs?
Yes, though the texture will be different.
Increase the cornstarch slightly for additional thickening.
How Long Does It Need to Chill?
At least 4 hours.
Overnight chilling produces the best results.
Can I Use Chocolate Chips Instead of Cocoa?
You can replace some of the cocoa with melted chocolate chips, but cocoa powder provides the traditional old-fashioned flavor.
What’s the Best Way to Slice It?
Use a sharp knife dipped in warm water and wipe clean between cuts.
This creates beautiful, bakery-style slices.
Why This Recipe Never Goes Out of Style
Old-Fashioned Chocolate Pie has remained a beloved dessert for generations because it delivers exactly what people crave: comfort, simplicity, and incredible flavor.
Unlike trendy desserts that come and go, this pie relies on timeless ingredients and classic techniques. Every slice feels familiar, comforting, and satisfying.
It is proof that you don’t need elaborate decorations or complicated methods to create a memorable dessert.
Final Thoughts
This Deliciously Simple Old-Fashioned Chocolate Pie is everything a homemade dessert should be—rich, creamy, comforting, and wonderfully nostalgic. With its silky chocolate custard filling, flaky crust, and cloud of fresh whipped cream, it captures the essence of classic home baking in every bite.
Whether you are making it for a holiday celebration, a family gathering, or simply because you’re craving chocolate, this pie delivers dependable results and unforgettable flavor. The simple ingredients, easy preparation, and make-ahead convenience make it a recipe you’ll return to again and again.
Print
Old-Fashioned Chocolate Pie
- Total Time: 290 minutes
- Yield: 8 servings 1x
- Diet: Vegetarian
Description
A nostalgic dessert that combines rich chocolate flavor with a silky custard filling, perfect for family gatherings and holiday celebrations.
Ingredients
- 1 baked 9-inch pie crust
- 1 cup granulated sugar
- 1/3 cup unsweetened cocoa powder
- 1/4 cup cornstarch
- Pinch of salt
- 2¼ cups whole milk
- 3 large egg yolks, whisked
- 3 tablespoons unsalted butter
- 2 teaspoons vanilla extract
- Fresh whipped cream for serving
- Cocoa powder for dusting (optional)
- Chocolate shavings (optional)
Instructions
- Prepare the pie crust by baking it according to package or recipe directions and allow it to cool completely.
- Combine dry ingredients: sugar, cocoa powder, cornstarch, and salt in a medium saucepan.
- Add the milk gradually while whisking continuously until smooth.
- Cook the mixture over medium heat, whisking frequently until it thickens.
- Temper the egg yolks by slowly adding some hot chocolate mixture while whisking until combined.
- Finish the custard by pouring the tempered yolk mixture back into the saucepan and cooking until thick and glossy.
- Add butter and vanilla extract, stirring until fully incorporated.
- Fill the cooled pie crust with the chocolate filling and smooth the surface.
- Chill thoroughly in the refrigerator for at least 4 hours or overnight for best results.
- Garnish with fresh whipped cream, cocoa powder, or chocolate shavings before serving.
Notes
For the best texture, allow the pie to chill overnight. Avoid overcooking the custard to maintain a smooth texture.
- Prep Time: 30 minutes
- Cook Time: 20 minutes
- Category: Dessert
- Method: Baking
- Cuisine: American
Nutrition
- Serving Size: 1 slice
- Calories: 350
- Sugar: 25g
- Sodium: 180mg
- Fat: 15g
- Saturated Fat: 8g
- Unsaturated Fat: 5g
- Trans Fat: 0g
- Carbohydrates: 45g
- Fiber: 2g
- Protein: 6g
- Cholesterol: 100mg
Keywords: chocolate pie, dessert, classic dessert, homemade chocolate, custard pie