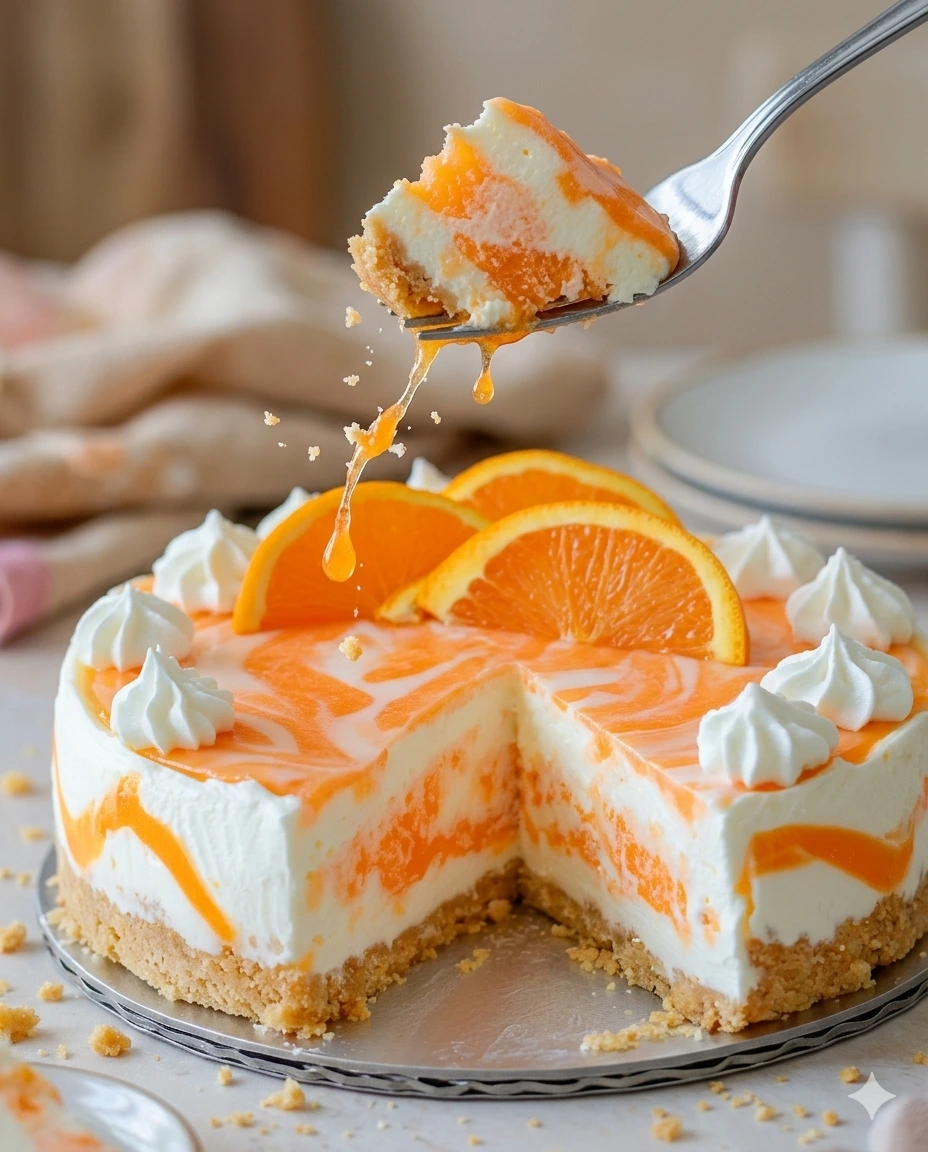
No-Bake Orange Creamsicle Cheesecake
Nothing evokes the carefree joy of warm summer afternoons quite like the classic flavor profile of an orange creamsicle. This No-Bake Orange Creamsicle Cheesecake transforms those cherished childhood memories into a sophisticated, show-stopping dessert. Combining a velvety, cloud-like cheesecake base with vibrant citrus-infused ribbons, this treat delivers a flawless balance of bright, tangy citrus and smooth vanilla sweetness.
Built upon a rich, buttery graham cracker foundation, the gorgeous marbled filling makes this cake look bakery-level impressive—all without requiring you to turn on your oven. It is the ultimate centerpiece for summer gatherings, backyard barbecues, and family celebrations.
Recipe Specifications
-
Course Type: Dessert, Celebration Cake
-
Culinary Style: Modern American Icebox Cake
-
Preparation Method: 100% No-Bake (No Oven Required)
-
Setting Duration: Refrigerated for at least 6 hours (overnight highly recommended)
-
Yield: 12 large, decadent servings
-
Skill Level: Easy to Intermediate (requires a gentle hand for marble swirling)
Comprehensive Ingredients Checklist
To guarantee a luxurious texture and beautiful visual layers, ensure all ingredients are gathered and processed at their recommended temperatures before assembly.
1. The Buttery Graham Cracker Crust
-
2 cups graham cracker crumbs (approximately 14 whole sheets, finely milled)
-
6 tablespoons unsalted butter, completely melted
-
A pinch of salt
2. The Orange Gelatin Base
-
1 box (3 oz) orange gelatin dessert mix (such as Jell-O)
-
1 cup boiling water
3. The Velvety Cheesecake Filling
-
16 oz (2 blocks) cream cheese, full-fat variety, thoroughly softened to room temperature
-
1½ cups powdered sugar, divided
-
2 cups heavy whipping cream, chilled
-
½ teaspoon pure vanilla extract
-
Zest of 1 fresh orange (optional, but highly recommended for an authentic citrus pop)
4. The Presentation Garnish
-
Whipped cream (for piping decorative stars or borders)
-
Fresh orange slices
Step-by-Step Culinary Instructions
The secret to a structurally sound no-bake cheesecake lies in temperature control and the precise aeration of the heavy cream. Follow these chronological phases to build your masterpiece.
Phase 1: Preparation & Crust Construction
-
Dissolve the Gelatin: In a heatproof bowl, whisk together the 3 oz box of orange gelatin mix and 1 cup of boiling water until the crystals are fully dissolved. Set the bowl aside on the counter and allow it to cool completely to room temperature, which takes about 30 minutes. Note: It must be cool to the touch, but still liquid, before incorporating into the dairy.
-
Prep the Springform Pan: Lightly coat a 9-inch springform pan with cooking spray. For a flawless presentation, line both the bottom base and the interior sides with parchment paper. This ensures effortless removal later.
-
Bind the Crumbs: In a medium-sized mixing bowl, combine the 2 cups of fine graham cracker crumbs, 6 tablespoons of melted butter, and a pinch of salt. Stir with a fork until the crumbs are evenly moistened and resemble wet sand.
-
Compress the Base: Pour the crumb mixture into your prepared pan. Using clean hands or the flat, heavy bottom of a dry measuring cup, press the mixture firmly into the bottom of the pan and slightly up the sides to form a tight, uniform crust.
-
Set the Foundation: Place the pan directly into the freezer for at least 30 minutes to lock the butter matrix and solidify the crust.
+-------------------------------------------------------------+
|         GARNISH LAYER (Whipped Cream Stars & Orange Slices) | <- Fresh finish
+-------------------------------------------------------------+
|    MARBLED CHEESECKAE FILLING (Cream Cheese & Orange Swirls)| <- Velvety ribbons
+-------------------------------------------------------------+
|              COMPACTED GRAHAM CRACKER CRUST                 | <- Solid, buttery base
+-------------------------------------------------------------+
Phase 2: Whipping the Fillings
-
Cream the Cheese: In a large mixing bowl, beat your 16 oz of softened cream cheese and 1 cup of the powdered sugar together with an electric mixer on medium-high speed until the mixture is silky smooth, pale, and free of lumps.
-
Whip the Cream to Stiff Peaks: In a separate, clean bowl, combine the 2 cups of chilled heavy whipping cream, the remaining ½ cup of powdered sugar, ½ teaspoon of vanilla extract, and the optional fresh orange zest. Beat on high speed until stiff peaks form.
-
Divide and Conquer: Now, you will split your whipped elements to create the two distinct marbling batters:
-
The Cream Cheese Mixture: Take exactly half of your stiffly whipped cream and gently fold it into the sweetened cream cheese base using a rubber spatula until light and fluffy.
-
The Orange Mixture: Take the remaining half of the whipped cream and gently fold it into the cooled, liquid orange gelatin until fully combined and uniform in color.
-
Phase 3: The Signature Swirl Technique
-
Alternate Layering: Retrieve your ice-cold crust from the freezer. Using two separate spoons or cookie scoops, alternate dropping large spoonfuls of the white cream cheese mixture and the vibrant orange mixture into the crust. Layer them randomly on top of and next to each other until all of both fillings are used up.
-
Create the Creamsicle Ribbons: Take a clean butter knife and submerge it vertically into the filling. Gently drag the knife through the batter in a figure-eight or swirling pattern. Pro-Tip: Do not over-swirl, or the two mixtures will completely blend into a solid peach color. A few gentle sweeps are all it takes to lock in those striking, bakery-style visual ribbons.
Phase 4: The Deep Chill & Presentation
-
The Setting Phase: Cover the springform pan securely with plastic wrap. Place it in the refrigerator to chill for at least 6 hours, or overnight, until the cake is completely set and solid.
-
Unmold with Care: Once fully set, unlatch the collar of your springform pan and slide it upward. Gently peel away the parchment paper sides. Transfer the cheesecake to a serving platter or cake stand.
-
Decorate and Serve: Garnish the top beautifully with swirls of piped whipped cream and fresh orange slices. Slice and enjoy ice-cold!
Chef’s Professional Success Techniques
-
The Cold Tool Strategy: For maximum volume and a remarkably airy texture, place your mixing bowl and electric mixer beaters into the freezer for 10 to 15 minutes before whipping the heavy cream. Chilled tools keep the dairy fats cold, allowing the cream to trap air quickly and form stable, rigid peaks.
-
The Clean-Slice Method: To achieve flawless, restaurant-quality slices that showcase the inner marble pattern, run a long, sharp chef’s knife under hot tap water, wipe the blade completely dry with a clean kitchen towel, and cut straight down through the cake. Repeat the rinsing and wiping process between every single cut to keep the sticky filling from dragging across the layers.
-
Soft Cream Cheese is Non-Negotiable: Ensure your cream cheese blocks sit out at room temperature for 1 to 2 hours before mixing. Attempting to blend cold cream cheese will yield tiny, stubborn lumps that cannot be smoothed out, compromising the velvety mouthfeel of the cake.
Frequently Asked Questions (FAQs)
Can I use real whipped cream for the garnish ahead of time?
While fresh whipped cream is perfect for serving, it can deflate if left on the cake for several days in the fridge. If you are preparing this cheesecake a day or two in advance of a party, wait to add the decorative whipped cream stars and fresh orange slices until right before your guests arrive to ensure a crisp presentation.
How should I store leftovers and how long do they last?
Keep any remaining cheesecake slices covered tightly with plastic wrap or stored inside an airtight container in the refrigerator. Thanks to the stabilizing properties of the gelatin and cream cheese, it holds its structure beautifully and will remain fresh, creamy, and delicious for up to 4 to 5 days.
What pairs well with this dessert?
This cheesecake is best enjoyed ice-cold on a warm afternoon. The bright, sweet-tart citrus profile cuts through rich foods wonderfully, making it an excellent companion to a robust cup of hot black coffee, a smooth cold brew, or a tall glass of unsweetened iced black tea.
Try Also: Irresistible Dessert Ideas from

No-Bake Orange Creamsicle Cheesecake
- Total Time: 360 minutes
- Yield: 12 servings 1x
- Diet: Vegetarian
Description
A sophisticated no-bake cheesecake that captures the classic flavor of orange creamsicle in a creamy, marbled dessert, perfect for summer gatherings.
Ingredients
- 2 cups graham cracker crumbs (approximately 14 whole sheets, finely milled)
- 6 tablespoons unsalted butter, completely melted
- A pinch of salt
- 1 box (3 oz) orange gelatin dessert mix (such as Jell-O)
- 1 cup boiling water
- 16 oz (2 blocks) cream cheese, full-fat variety, thoroughly softened to room temperature
- 1½ cups powdered sugar, divided
- 2 cups heavy whipping cream, chilled
- ½ teaspoon pure vanilla extract
- Zest of 1 fresh orange (optional)
- Whipped cream (for piping decorative stars or borders)
- Fresh orange slices
Instructions
- Dissolve the gelatin: In a heatproof bowl, whisk together the orange gelatin mix and boiling water until fully dissolved. Allow to cool to room temperature.
- Prep the springform pan: Lightly coat a 9-inch springform pan with cooking spray and line it with parchment paper.
- Bind the crumbs: Combine graham cracker crumbs, melted butter, and salt in a bowl. Stir until evenly moistened.
- Compress the base: Pour crumb mixture into the pan and press firmly into the bottom and up the sides.
- Set the foundation: Place the pan in the freezer for at least 30 minutes.
- Cream the cheese: Beat cream cheese and 1 cup of powdered sugar until smooth.
- Whip the cream to stiff peaks in a separate bowl.
- Divide the whipped cream mixture into two bowls: fold half into the cream cheese mixture and the other half into the cooled orange gelatin.
- Layer the two mixtures in the crust, alternating them.
- Create cream cheese and orange swirls using a butter knife.
- Cover with plastic wrap and refrigerate for at least 6 hours or overnight.
- Unmold and decorate with whipped cream and orange slices before serving.
Notes
To achieve stable whipped cream, chill your mixing tools before use. For perfect slices, use a warm knife and clean between cuts.
- Prep Time: 30 minutes
- Cook Time: 0 minutes
- Category: Dessert
- Method: No-Bake
- Cuisine: Modern American
Nutrition
- Serving Size: 1 slice
- Calories: 450
- Sugar: 35g
- Sodium: 350mg
- Fat: 25g
- Saturated Fat: 15g
- Unsaturated Fat: 8g
- Trans Fat: 0g
- Carbohydrates: 50g
- Fiber: 1g
- Protein: 6g
- Cholesterol: 60mg
Keywords: no-bake cheesecake, orange creamsicle, summer dessert, easy cheesecake, modern american cake