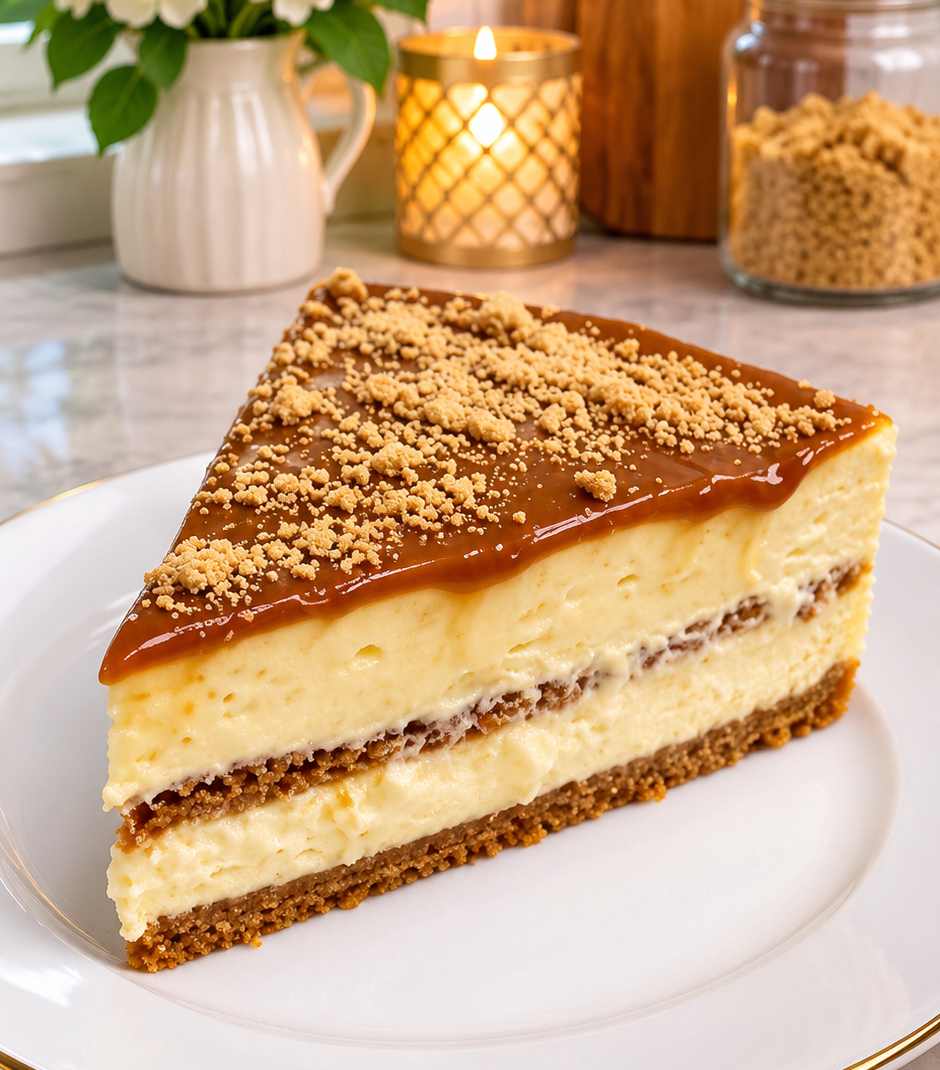
If you love creamy desserts with layers of soft biscuits and rich caramel, this Caramel Biscuit Cake with Mascarpone is going to be a new favorite. It combines everything you want in an easy no-bake treat: coffee-dipped tea biscuits, a light and fluffy mascarpone filling, and a smooth caramel topping that makes every slice look irresistible.
The best part? You don’t need to turn on your oven or spend hours preparing complicated layers. A few simple ingredients come together to create a beautiful chilled dessert that tastes like something from a bakery.
Each layer has its own delicious texture. The biscuits soften as they rest in the refrigerator, the mascarpone filling stays creamy and airy, and the caramel topping adds a sweet, buttery finish. A little coffee in the biscuit layers also balances the sweetness and gives the cake a lovely flavor.
Whether you’re making dessert for a family gathering, a weekend treat, a birthday table, or simply because you’re craving something sweet, this no-bake caramel biscuit cake is an easy recipe worth keeping.
Why You’ll Love This Caramel Biscuit Cake
There are plenty of reasons to add this dessert to your recipe collection.
No oven required: Everything is assembled in a pan and chilled in the refrigerator. It’s especially convenient when you want a homemade dessert without heating up the kitchen.
Simple ingredients: Tea biscuits, mascarpone, whipping cream, powdered sugar, and caramel cream create a dessert that feels special without requiring a long shopping list.
Beautiful layers: The biscuit base, fluffy mascarpone filling, and glossy caramel topping make every slice look impressive.
Creamy and light texture: Mascarpone provides a rich, smooth flavor, while whipped cream keeps the filling airy rather than overly dense.
Make-ahead friendly: Since the cake needs time to chill, you can prepare it ahead of serving. This makes it a practical choice when you’re entertaining guests.
Easy to customize: You can use coffee or milk for dipping, choose your favorite biscuit decoration, and add a little extra caramel drizzle before serving.
What Is Caramel Biscuit Cake?
Caramel biscuit cake is a chilled, layered dessert made by arranging biscuits with a creamy filling and allowing everything to set in the refrigerator. Instead of baking a traditional cake, the biscuits become soft and cake-like as they absorb moisture from the filling.
This version uses mascarpone and whipped cream to create a smooth, airy filling. A little caramel cream adds sweetness and flavor, while the final caramel layer gives the dessert a glossy finish.
The biscuits are briefly dipped in coffee or milk before being arranged in the pan. Coffee gives the cake a deeper flavor and creates a delicious contrast with the sweet caramel. Milk offers a milder taste, making it a good choice if you prefer a softer, more delicate flavor.
Once assembled, the cake needs several hours in the refrigerator. This resting time allows the biscuits to soften, the filling to firm up, and the layers to hold together when sliced.
Ingredients for Caramel Biscuit Cake with Mascarpone
You only need a handful of ingredients to make this easy no-bake dessert. Each one plays an important role in creating the final texture and flavor.
For the Biscuit Base
150 g petit biscuits or similar tea biscuits
Petit biscuits or plain tea biscuits are the foundation of this dessert. They soften beautifully after being dipped and chilled, creating layers that resemble a soft cake.
Choose biscuits without cream filling. Plain biscuits work best because they absorb the coffee or milk without making the dessert overly sweet.
100 ml coffee or milk for dipping
You can use either coffee or milk, depending on the flavor you prefer.
Coffee gives the cake a slightly bold flavor that balances the sweetness of the mascarpone filling and caramel topping. For the best contrast, use strong coffee that has cooled before dipping.
Milk creates a gentler flavor and is a good option if you’re serving people who don’t enjoy coffee.
For the Mascarpone Filling
250 ml cold whipping cream
Cold whipping cream is essential for achieving a fluffy filling. It needs to be properly chilled before whipping so it can reach firm peaks.
Keep the cream in the refrigerator until you’re ready to use it. Warm cream takes longer to whip and may not hold its shape as well.
250 g mascarpone
Mascarpone is a soft Italian cream cheese with a rich, delicate flavor. It gives the filling its smooth consistency and creamy taste.
Use mascarpone straight from the refrigerator, and mix it until smooth before combining it with the whipped cream.
1 tablespoon powdered sugar
Powdered sugar adds sweetness while blending smoothly into the mascarpone. It helps keep the filling creamy without introducing a grainy texture.
2 tablespoons caramel cream
Caramel cream adds a buttery caramel flavor to the whipped cream mixture. It also ties the filling together with the caramel topping.
For the Caramel Topping
3 tablespoons caramel cream
This creates the glossy caramel layer on top of the chilled cake. Gently warming it makes it easier to pour and spread.
1 to 2 tablespoons milk, only if needed to thin the caramel
The milk is optional. Add it only if your caramel cream is too thick to spread smoothly.
Start with a small amount and mix until the caramel reaches a pourable consistency.
Optional Decorations
The cake is delicious without extra decoration, but you can make it look even more inviting with:
- Crushed biscuits
- Caramel bits or candies
- Whipped cream swirls
- Extra caramel drizzle
- A little chocolate shaving
These decorations are optional and can be adjusted to suit your preference.
Helpful Equipment
You don’t need any special baking equipment for this recipe. A few basic kitchen tools are enough.
- A rectangular or square dessert pan
- Two mixing bowls
- An electric hand mixer or stand mixer
- A spatula
- A spoon or small bowl for dipping biscuits
- A small heatproof bowl for warming the caramel
Choose a pan that allows you to arrange the biscuits in an even layer. The exact dimensions are not specified in the original recipe, so use a pan that fits your biscuits comfortably.
How to Make Caramel Biscuit Cake with Mascarpone
This no-bake dessert comes together in a few simple stages. The key is to prepare the mascarpone filling carefully, avoid soaking the biscuits, and give the cake enough time to chill.
Step 1: Prepare the Biscuit Base
Start by preparing your coffee or milk for dipping. If you’re using coffee, allow it to cool before assembling the cake.
Briefly dip each biscuit into the coffee or milk. A quick dip is enough. Avoid leaving the biscuits in the liquid for too long because they can become overly soft and difficult to arrange.
Arrange the dipped biscuits in a single layer across the bottom of your rectangular or square pan.
Continue until the entire bottom is covered. Try to keep the biscuits close together so the base is even.
Helpful tip: Don’t worry if you need to adjust the position of a few biscuits to fill small gaps. A neat base helps the finished cake hold together when sliced.
Step 2: Prepare the Mascarpone Mixture
Place the mascarpone in a mixing bowl.
Add the powdered sugar and mix until the mixture becomes smooth and creamy.
Avoid overmixing. You only need to combine the ingredients until there are no obvious lumps and the mixture has a consistent texture.
Set the bowl aside while you prepare the whipped cream.
Step 3: Whip the Cream with Caramel
Pour the cold whipping cream into a second mixing bowl.
Add the 2 tablespoons of caramel cream.
Using an electric mixer, whip the mixture until firm peaks form.
Firm peaks mean the whipped cream holds its shape when you lift the beaters. It should look fluffy and stable rather than runny.
Make sure the cream is cold before whipping. This helps it reach the right consistency.
Helpful tip: Watch the cream closely as it thickens. Once firm peaks form, stop mixing to avoid overwhipping.
Step 4: Combine the Mascarpone and Whipped Cream
Add the whipped cream mixture to the mascarpone mixture.
Using a spatula, gently fold the two mixtures together until evenly combined.
Use slow, gentle movements, bringing the mixture from the bottom of the bowl toward the top. This helps preserve the air incorporated into the whipped cream.
The finished filling should look smooth, creamy, and fluffy.
Avoid stirring aggressively because that can deflate the whipped cream and make the filling less airy.
Step 5: Add the First Cream Layer
Divide the mascarpone filling into two equal parts.
Spread half of the filling over the biscuit base.
Use a spatula to distribute it evenly, making sure the biscuits are covered from edge to edge.
Smooth the surface gently before adding the next biscuit layer.
Step 6: Add the Second Biscuit Layer
Briefly dip the remaining biscuits in coffee or milk.
Arrange them carefully over the first cream layer, creating another even layer.
As before, avoid soaking the biscuits. They should be lightly moistened, not saturated.
Try to arrange the biscuits so they cover as much of the cream as possible.
Step 7: Finish with the Remaining Filling
Spread the remaining mascarpone filling over the second biscuit layer.
Use a spatula to smooth the surface evenly.
Take a moment to level the top, especially around the edges. A smooth surface makes it easier to add the caramel topping later.
Step 8: Chill the Cake
Cover the pan and place it in the refrigerator for 2 to 3 hours.
This is one of the most important steps in the recipe.
During chilling, the biscuits gradually soften and absorb moisture from the surrounding layers. At the same time, the mascarpone filling becomes firmer, helping the cake hold its shape.
Avoid rushing this stage. Cutting the cake before it has properly chilled can result in soft, messy slices.
Step 9: Prepare the Caramel Topping
Once the cake has chilled, prepare the topping.
Place the 3 tablespoons of caramel cream in a heatproof bowl.
Gently warm it over steam or on very low heat until it becomes smooth and easier to pour.
If the caramel is too thick, add 1 to 2 tablespoons of milk, only as needed, to thin it.
Mix until the caramel reaches a smooth, pourable consistency.
Allow it to cool slightly before using. It should be warm, not hot.
Important: Don’t pour hot caramel directly over the chilled mascarpone filling. Letting it cool slightly helps protect the creamy top layer.
Step 10: Add the Caramel Layer
Remove the chilled cake from the refrigerator.
Pour the slightly cooled caramel over the top.
Spread it gently with a spoon or spatula if needed, creating an even layer across the surface.
Work carefully so you don’t disturb the mascarpone filling underneath.
Step 11: Chill Again
Return the cake to the refrigerator for another hour.
This final chilling period allows the caramel topping to set and gives the dessert a more finished appearance.
Step 12: Decorate and Serve
Once the topping has set, decorate the cake as desired.
You can add crushed biscuits, whipped cream swirls, caramel bits or candies, extra caramel drizzle, or a little chocolate shaving.
Slice the cake carefully and serve chilled.
For cleaner slices, use a sharp knife and wipe it between cuts.
Tips for the Best Caramel Biscuit Cake
A few simple details can make a big difference in the final result.
Use Cold Whipping Cream
Cold cream is easier to whip and helps create a stable filling. Keep it refrigerated until you’re ready to use it.
If your kitchen is warm, you can also chill the mixing bowl and beaters before whipping.
Don’t Soak the Biscuits
The biscuits only need a quick dip in coffee or milk.
Over-soaked biscuits can break apart during assembly and may make the bottom layers too wet.
A brief dip allows them to soften gradually while the cake chills.
Choose Plain Tea Biscuits
Plain petit biscuits or similar tea biscuits are ideal for this recipe.
Avoid biscuits with cream filling because they can change the texture and sweetness of the dessert.
Fold the Filling Gently
Once the whipped cream is ready, gently fold it into the mascarpone mixture.
This keeps the filling light and airy. Vigorous mixing can remove some of the air and create a heavier texture.
Use Smooth Caramel Cream
A smooth caramel cream makes the topping easier to spread and gives the cake a beautiful finish.
If the caramel is too thick, use the optional milk gradually until it becomes pourable.
Let the Caramel Cool Slightly
The caramel should be warm rather than hot when you pour it over the chilled cake.
This helps prevent the topping from disturbing or softening the mascarpone layer.
Give the Cake Enough Chilling Time
Don’t skip the refrigerator time.
The first chilling period helps the biscuit and cream layers set, while the final hour gives the caramel topping time to firm up.
For the neatest slices, make sure the cake is properly chilled before serving.
Common Mistakes to Avoid
Even a simple no-bake dessert can be affected by a few small mistakes.
Soaking the biscuits for too long: This can make them fall apart and create a soggy base. Dip each biscuit quickly instead.
Using warm whipping cream: Warm cream may struggle to whip properly. Start with cold cream for a fluffier filling.
Overwhipping the cream: Whip only until firm peaks form. Continuing for too long can make the cream grainy or overly stiff.
Mixing the filling too aggressively: Fold the whipped cream gently into the mascarpone to preserve its airy texture.
Pouring hot caramel over the filling: Very hot caramel can soften the cream layer. Let it cool until warm before pouring.
Cutting the cake too early: The layers need time to firm up. Rushing the chilling process can make the slices messy.
Easy Variations to Try
The original recipe is delicious as written, but there are a few ways to adjust the flavor while keeping the same basic layered dessert idea.
Coffee Biscuit Cake
Use coffee instead of milk for dipping the biscuits.
Strong coffee gives the dessert a deeper flavor and balances the sweetness of the caramel filling.
Milk-Dipped Biscuit Cake
If you prefer a milder dessert, use milk for dipping.
This option keeps the biscuit layers delicate and lets the mascarpone and caramel flavors stand out.
Dulce de Leche Version
If you cannot find caramel cream, dulce de leche or a thick caramel sauce can be used instead.
Choose a thick, smooth product that works well in both the filling and topping.
Chocolate and Caramel Decoration
Add a little chocolate shaving over the finished cake.
Chocolate pairs naturally with caramel and gives the dessert a slightly richer finish.
Extra Biscuit Crunch
Sprinkle crushed biscuits over the top just before serving.
This adds a little texture and gives the cake a simple, homemade finish.
These are optional serving and decoration ideas. Keep the original ingredient quantities and preparation method unchanged if you want to follow the recipe exactly.
How to Serve Caramel Biscuit Cake
This dessert is best served chilled, straight from the refrigerator.
Its creamy texture and caramel topping make it a lovely finish to a family dinner or a special weekend meal.
Here are a few simple serving ideas:
- Serve each slice with an extra drizzle of caramel.
- Add a small whipped cream swirl beside each slice.
- Sprinkle crushed biscuits over the top for extra texture.
- Add a little chocolate shaving for a chocolate-caramel combination.
- Serve with a cup of coffee or tea.
Because the cake is already rich and creamy, small slices are usually satisfying.
How to Store Caramel Biscuit Cake
Keep the cake covered in the refrigerator.
Since the filling contains mascarpone and whipped cream, it should remain chilled rather than sitting at room temperature for extended periods.
For the best texture and flavor, keep it covered and enjoy it while fresh. Store leftovers in an airtight container or cover the pan tightly to protect the dessert from absorbing other refrigerator odors.
When serving leftovers, remove only the slices you need and return the remaining cake to the refrigerator promptly.
Can You Make This Cake Ahead of Time?
Yes. This recipe is especially convenient for preparing ahead because it already requires several hours of chilling.
You can assemble the biscuit and mascarpone layers, cover the pan, and refrigerate it for the initial 2 to 3 hours.
Prepare and add the caramel topping afterward, then return the cake to the refrigerator for the additional hour.
For the best appearance, add optional decorations close to serving time. This helps crushed biscuits stay crisp and keeps whipped cream decorations looking fresh.
Frequently Asked Questions
Can I use milk instead of coffee?
Yes. The recipe allows either coffee or milk for dipping the biscuits.
Coffee gives the dessert a stronger flavor and balances the sweetness of the filling. Milk creates a milder taste.
Why should I avoid soaking the biscuits?
The biscuits need only a quick dip because they will continue to soften while the cake rests in the refrigerator.
If they become too wet during dipping, they may break apart and make the layers difficult to assemble.
Can I use another type of biscuit?
Yes. Petit biscuits or similar plain tea biscuits are suitable.
Choose biscuits without cream filling so they soften evenly and don’t overpower the mascarpone and caramel flavors.
How do I know when the whipping cream is ready?
The cream is ready when firm peaks form.
When you lift the beaters, the whipped cream should hold its shape rather than immediately falling back into the bowl.
Why does the filling need to be folded gently?
Gentle folding helps preserve the air in the whipped cream.
This creates a lighter filling and helps the cake maintain its soft, fluffy texture.
What if my caramel cream is too thick?
Warm the caramel gently over steam or on very low heat.
If it still isn’t pourable, add 1 to 2 tablespoons of milk, only as needed, until it reaches a smooth consistency.
Should the caramel topping be hot?
No. It should be warm, not hot.
Allow it to cool slightly before pouring it over the chilled cake.
Why does the cake need to chill twice?
The first chilling period helps the biscuit and mascarpone layers set.
The second chilling period gives the caramel topping time to firm up, making the finished cake easier to slice and serve.
Can I decorate the cake before serving?
Yes. You can decorate it with crushed biscuits, caramel bits or candies, whipped cream swirls, extra caramel drizzle, or chocolate shavings.
For the freshest appearance, add delicate decorations shortly before serving.
Can I use dulce de leche instead of caramel cream?
Yes. The recipe notes that dulce de leche or a thick caramel sauce can be used if caramel cream is unavailable.
Choose a smooth consistency so it can be mixed into the filling and spread over the top.
Recipe Details
- Recipe Name: Caramel Biscuit Cake with Mascarpone
- Recipe Type: No-Bake Dessert
- Preparation Time: 20 minutes
- Initial Chilling Time: 2 to 3 hours
- Final Topping Chilling Time: 1 hour
- Total Time: Approximately 3 hours 20 minutes to 4 hours 20 minutes
- Servings: 8
- Calories: 350 kcal per serving, as provided
Caramel Biscuit Cake with Mascarpone Recipe
Ingredients
For the Base
- 150 g petit biscuits or similar tea biscuits
- 100 ml coffee or milk for dipping
For the Filling
- 250 ml cold whipping cream
- 250 g mascarpone
- 1 tablespoon powdered sugar
- 2 tablespoons caramel cream
For the Topping
- 3 tablespoons caramel cream
- 1 to 2 tablespoons milk only if needed to thin the caramel
Optional Decoration
- Crushed biscuits
- Caramel bits or candies
- Whipped cream swirls
- Extra caramel drizzle
- A little chocolate shaving
Instructions
- Briefly dip each biscuit in coffee or milk. Do not soak them.
- Arrange the dipped biscuits in a single layer over the bottom of a rectangular or square pan until fully covered.
- In one bowl, mix the mascarpone and powdered sugar until smooth and creamy.
- In a second bowl, whip the cold whipping cream with 2 tablespoons caramel cream until firm peaks form.
- Using a spatula, gently fold the whipped cream mixture into the mascarpone mixture until evenly combined.
- Divide the filling into 2 equal parts.
- Spread half of the filling evenly over the biscuit base and smooth the top.
- Dip the remaining biscuits briefly in coffee or milk and arrange them over the first cream layer in an even layer.
- Spread the remaining filling over the second biscuit layer and smooth the top evenly.
- Cover and refrigerate for 2 to 3 hours so the cake can set.
- Gently warm the 3 tablespoons caramel cream over steam or on very low heat.
- Add 1 to 2 tablespoons milk only if needed, until the caramel becomes pourable and smooth.
- Let it cool slightly so it is warm, not hot.
- Pour it over the chilled cake and spread gently if needed.
- Return the cake to the fridge for 1 more hour to set the topping.
- Decorate as desired with crushed biscuits, whipped cream, extra caramel, caramel bits, or a little chocolate shaving.
- Slice and serve chilled.
Final Thoughts
This Caramel Biscuit Cake with Mascarpone proves that you don’t need an oven or complicated ingredients to make a dessert that looks and tastes special. Soft biscuit layers, fluffy mascarpone cream, and a glossy caramel topping come together in a simple chilled treat that’s perfect for sharing.
The secret is giving the cake enough time in the refrigerator. Let the biscuits soften, allow the filling to firm up, and give the caramel topping time to set before slicing.
Make it for your next family gathering, weekend dessert, or whenever you’re craving something creamy and sweet. One slice is all it takes to see why this easy no-bake caramel biscuit cake deserves a place in your dessert collection.