Step into the comforting world of traditional American baking with this spectacular Amish Peanut Butter Cream Pie. Celebrating classic Amish culinary heritage, this prized dessert features a deep golden, flaky pie crust filled with a cloud-like, decadent peanut butter mousse and topped with crunchy roasted nuts.
By prioritizing room-temperature ingredients to eliminate lumps and masterfully folding a stabilized fresh whipped cream into a rich cream cheese base, you unlock a velvet-smooth texture that slices beautifully. It is an exceptionally luxurious showstopper that makes an elegant centerpiece for Sunday family dinners, holiday spreads, or any special occasion that calls for a truly nostalgic treat.
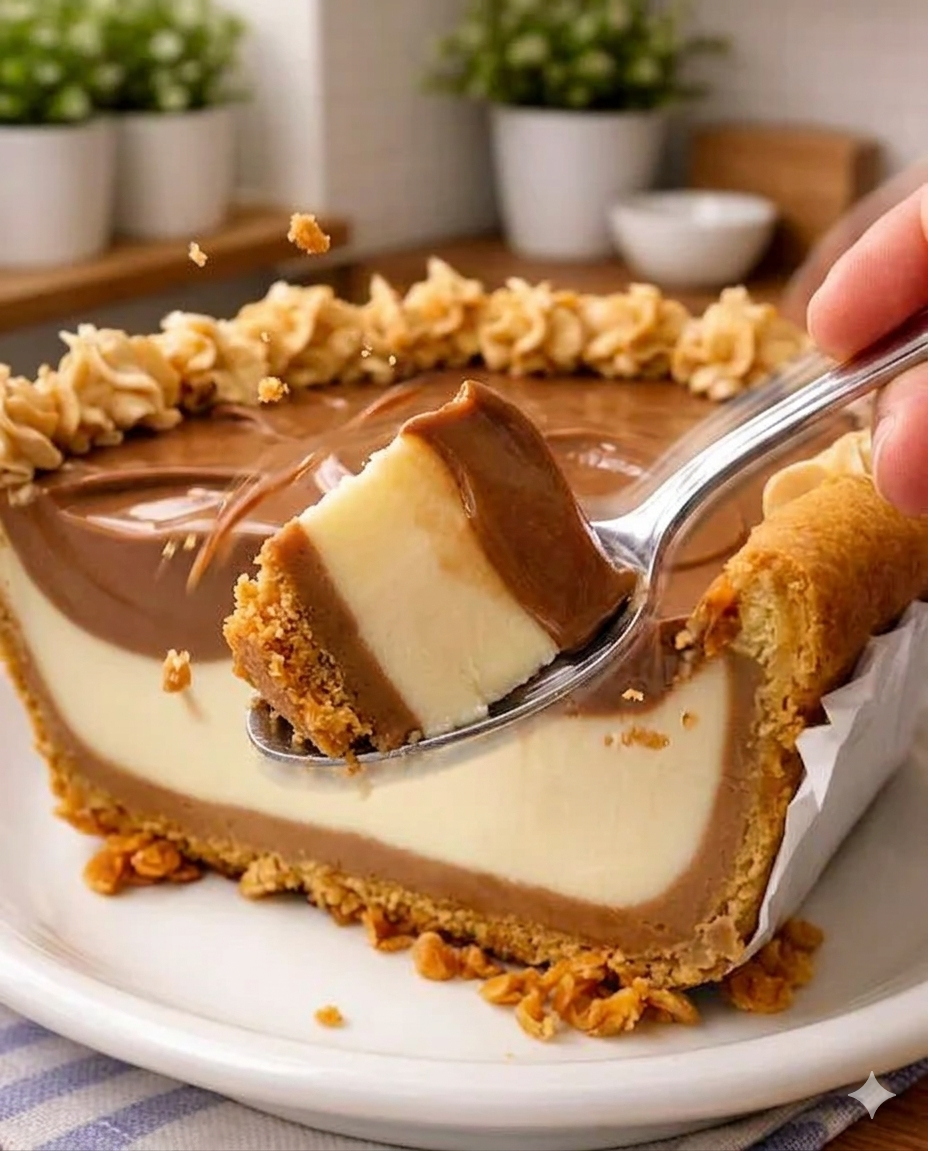
Why You Will Love This Amish Classic
-
The Ultimate Cloud-Like Texture: Blending stabilized whipped cream into a smooth cream cheese and peanut butter matrix creates an airy, feather-light mousse that melts in your mouth.
-
Flawless, Sharp-Edged Slices: A deliberate, cold-setting process allows the dairy and peanut fats to firm up completely, ensuring immaculate, restaurant-quality slices every single time.
-
The Perfect Textural Contrast: Every bite balances the crisp crunch of a baked pastry shell, the velvety silk of the mousse, and the rustic bite of chopped peanuts scattered across the top.
-
Effortless No-Bake Filling: Once your pastry shell is baked, the stove and oven get turned off completely—making this an ideal, low-stress treat to prepare ahead of time.
 Prep Time: 30 mins   |   Bake Time: Per Pan Specs   |   Chill Time: 4 hrs minimum
 Course: Dessert      |   Cuisine: American          |   Yield: 8 exquisite servings
Ingredients Checklist
Because achieving a silk-smooth mousse relies on proper fat emulsification, using the exact ingredient states specified below is crucial to prevent your filling from turning lumpy or splitting.
For the Golden Pastry Base
-
1 (9-inch) Pie Crust: You can use your favorite reliable scratch-made recipe or a premium store-bought refrigerated crust for a convenient shortcut.
For the Velvet Peanut Butter Mousse
-
1 cup Creamy Peanut Butter: Use standard, emulsified commercial brands (like Jif or Skippy). Do not use natural or organic style peanut butters that require stirring, as their excess surface oils will cause the delicate mousse filling to split.
-
8 oz Cream Cheese: Must be fully softened to room temperature. If the cream cheese is too cold, it will stubbornly refuse to blend cleanly, leaving unappealing white flecks throughout your smooth pie.
-
1 cup Powdered Sugar: Provides an elegant sweetness and dissolves instantly to ensure a flawless, smooth mouthfeel.
-
1 cup Heavy Cream: Must be deeply chilled before whipping; cold temperatures are essential for the fat molecules to trap air and build a stable structure.
-
1 teaspoon Vanilla Extract: Rounds out the earthy, nutty tones with a beautiful aromatic warmth.
For the Elegant Crown Garnish
-
½ cup Chopped Peanuts: Scattered across the surface right before cutting to add a brilliant pop of color and a roasted, salty snap.
Step-by-Step Instructions
Follow these clear, chronological directions to assemble, whip, fold, and perfectly set your traditional cream pie.
1. Bake and Cool the Pastry Base
-
Preheat your conventional oven to 350°F (175°C).
-
Press your 1 (9-inch) pie crust smoothly into the contours of your pie plate, crimping or fluting the upper edges decoratively.
-
Bake the crust according to its package instructions or your specific recipe’s directions until it is thoroughly baked through and displays a deep golden-brown hue.
-
Remove the crust from the oven and set it on a wire rack to cool completely to room temperature. Never add the mousse filling to a warm crust, or the heat will instantly melt the delicate dairy fats, turning your filling into a runny soup.
2. Blend the Peanut Butter Foundation
-
In a large mixing bowl, combine your room-temperature 8 oz of softened cream cheese, 1 cup of creamy peanut butter, and 1 cup of powdered sugar.
-
Using an electric hand mixer or a stand mixer fitted with the paddle attachment, blend on medium-high speed for 2 to 3 minutes until the mixture transforms into a completely smooth, uniform, and lump-free paste. Set aside.
3. Whip the Fresh Cream
-
In a separate, cleanly washed and chilled mixing bowl, pour your 1 cup of chilled heavy cream and add the 1 teaspoon of vanilla extract.
-
Using clean beaters or a whisk attachment, beat vigorously on high speed until the cream expands into a thick, structured matrix that holds stiff peaks firmly in the air when the beaters are lifted.
4. Fold and Chill to Perfection
-
Using a flexible rubber spatula, add about a third of your stiff whipped cream directly into the heavy peanut butter paste. Stir it in firmly to loosen up the thick base.
-
Add the remaining whipped cream to the bowl. Switch to a gentle hand, folding the cream using an under-and-over motion just until fully incorporated and no white streaks remain. Be exceptionally gentle here; over-mixing will pop the microscopic air bubbles inside the whipped cream, causing your pie to turn dense rather than light and fluffy.
-
Pour the cloud-like peanut butter blend into your completely cooled pastry shell, using an offset spatula to smooth the top surface into a pristine, elegant dome.
-
Transfer the pie to the refrigerator to chill for a minimum of 4 hours, though letting it rest overnight is highly recommended to allow the fats to set solidly for clean slicing.
5. Garnish and Serve
-
Right before you are ready to slice and serve, evenly sprinkle the ½ cup of chopped peanuts across the entire top surface of the pie.
-
The Clean-Slice Trick: To secure flawless vertical edges, dip a long, sharp chef’s knife into a tall glass of hot water, wipe it completely dry with a towel, and make one clean cut downward. Wipe the blade entirely clean and re-warm it before making your next cut. Serve cold!
Pro Presentation Secrets
Keep the Topping Crisp: Always hold off on adding your chopped peanuts until right before you carry the pie to the table. If you sprinkle the nuts on top before the long 4-hour refrigeration window, they will absorb the ambient moisture from the mousse and turn soft and chewy rather than intensely crisp and crunchy.
Storage and Freshness Guidelines
-
In the Refrigerator: Because this cream pie features high-volume dairy and cream components, it must always be stored in a cold environment. Keep any leftovers covered loosely with plastic wrap or resting under a protective pie dome in the fridge for up to 3 days.
Nutritional Summary
| Metric | Details |
| Calories | 320 kcal |
| Yield | 8 generous, decadent servings |
| Texture Profile | Flaky pastry base holding a feather-light, velvet cream filling capped with a distinct, crunchy nut finish. |
Frequently Asked Questions (FAQs)
Can I use a graham cracker crust instead of a traditional pastry shell?
Absolutely! If you prefer a sweet, cookie-style crunch over flaky pastry, an 8-inch or 9-inch graham cracker crust or Oreo cookie shell makes a phenomenal alternative. Just ensure that if you choose a store-bought or baked crumb crust, it is completely cooled to room temperature before filling.
Why did my filling turn out runny or separate?
This is almost always due to using a natural or organic style of peanut butter where the oil separates to the top of the jar. Those natural oils prevent the cream cheese fats from locking together smoothly. Stick to standard commercial creamy peanut butters to guarantee a perfectly stable, sliceable pie filling.
Final Thoughts
This Amish Peanut Butter Cream Pie represents the peak of old-school American dessert craftsmanship. By honoring the room-temperature rule for your cream cheese and protecting the delicate air inside your whipped cream with a gentle folding hand, you guarantee a breathtaking, velvety masterpiece that easily outperforms any store-bought alternative.
Try Also: Irresistible Dessert Ideas from
-
What is Dubai Chocolate Bar Made Of? Key Ingredients Explained
-
Rose Milk Cake Recipe
-
Strawberry Cheesecake Dump Cake Recipe
Be sure to Print Recipe or Pin Recipe so you have these essential cream-whipping and lump-free blending guidelines completely handy for your next casual family holiday spread or weekend baking celebration!
Amish Peanut Butter Cream Pie
- Total Time: 240 minutes
- Yield: 8 servings 1x
- Diet: Vegetarian
Description
A decadent peanut butter mousse pie with a flaky crust, topped with crunchy roasted nuts, perfect for special occasions.
Ingredients
- 1 (9-inch) Pie Crust
- 1 cup Creamy Peanut Butter
- 8 oz Cream Cheese
- 1 cup Powdered Sugar
- 1 cup Heavy Cream
- 1 teaspoon Vanilla Extract
- ½ cup Chopped Peanuts
Instructions
- Bake the pastry base by preheating the oven to 350°F (175°C). Press the pie crust smoothly into the pie plate and bake until golden brown. Cool completely.
- Blend the peanut butter foundation by mixing softened cream cheese, peanut butter, and powdered sugar until smooth.
- Whip the fresh cream with vanilla extract until stiff peaks form.
- Fold a third of the whipped cream into the peanut butter mixture, then gently fold in the remaining whipped cream until no white streaks remain.
- Pour the mousse into the cooled pastry shell and smooth the top. Chill in the refrigerator for at least 4 hours.
- Garnish with chopped peanuts right before serving and slice with a hot knife for clean edges.
Notes
Ensure all ingredients are at room temperature for best results. Store leftovers covered in the refrigerator for up to 3 days.
- Prep Time: 30 minutes
- Cook Time: 30 minutes
- Category: Dessert
- Method: Baking
- Cuisine: American
Nutrition
- Serving Size: 1 slice
- Calories: 320
- Sugar: 22g
- Sodium: 250mg
- Fat: 20g
- Saturated Fat: 10g
- Unsaturated Fat: 8g
- Trans Fat: 0g
- Carbohydrates: 30g
- Fiber: 2g
- Protein: 8g
- Cholesterol: 40mg
Keywords: peanut butter pie, Amish dessert, cream pie, no-bake pie